
How to Drill Angled Holes with a Drill Press: What to Check Before You Start
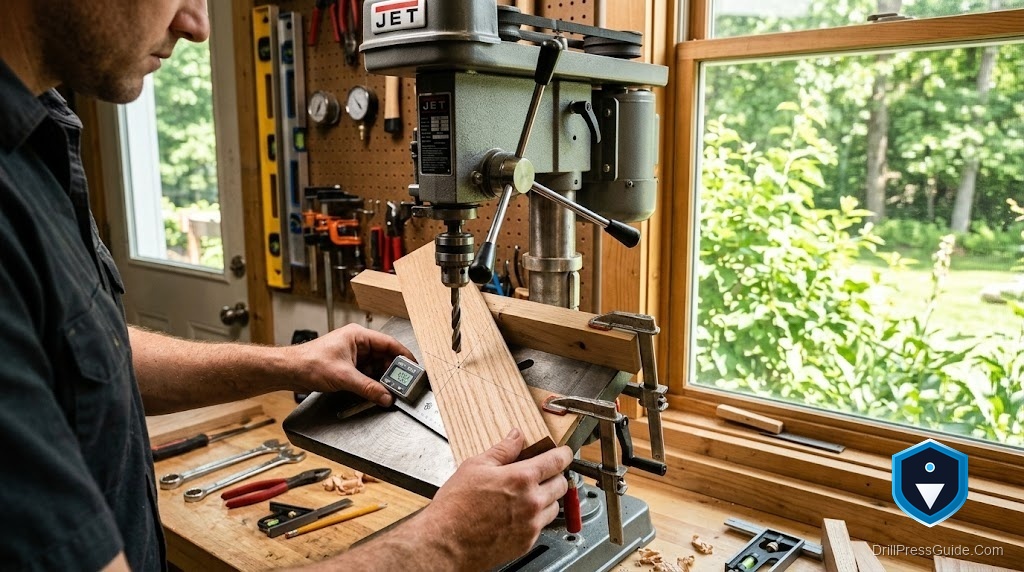
A drill press wants to drill straight down. That is its whole nature. So when a project calls for a hole at forty five degrees, a stopped chair leg, an angled dowel joint, a slanted mounting hole, you have to change the geometry between the bit and the work. There are two ways to do it, and picking the right one saves you a wandering bit and a ruined part.
Drilling an angled hole with a drill press means tilting either the work or the table so the surface meets the straight-down bit at the angle you want. The spindle still travels vertically, exactly as designed, but the workpiece now presents a slanted face to it. That is the key mental shift: you never angle the drill, you angle the work. Get that right and the machine’s accuracy carries over to angled holes just as well as vertical ones.
Here is the direct answer. You have two clean options. First, tilt the drill press table to the angle you need, if your table has a bevel adjustment, and clamp the work flat to the tilted table. Second, keep the table flat and tilt the workpiece instead, using an adjustable angle vise or a shop-made angled block. Either way, the rules are the same: clamp the work rigidly so it cannot slide down the slope, start the hole carefully because an angled surface makes the bit want to skate, and use a center punch or a stub start to give the bit a bite. A brad-point or a spotting drill helps enormously on the angled entry. Do those three things, secure clamping, a punched start, and a bit that resists skating, and angled holes come out clean.
Tilt the table or tilt the work
Tilting the table is elegant when your machine allows it and the part is small enough to sit on the tilted surface. Loosen the table bevel lock, set the angle against a protractor or angle gauge, retighten, and clamp the work flat to the table. The downside is that a tilted table can let the work and even loose tooling slide, so clamping becomes critical and you must keep the point of operation controlled.
Tilting the work keeps the table flat and stable, which many people prefer for larger or awkward pieces. An adjustable angle vise does this cleanly: it clamps the part and pivots to a set angle, so the table stays put and only the work leans. A tilting drill press vise such as the WEN 4212T tilting angle vise offers cast-iron jaws and marked tilt stops, which makes repeatable angled holes far easier than balancing a part on a wedge. For one-off angles, a carefully cut angled block under the work does the same job.
Beat the skating bit
The hard part of angled drilling is the start. On a slanted surface the bit’s tip touches on one side first, so it wants to slide downhill before it bites. Fight that three ways. Center-punch the exact spot to give the tip a divot to sit in. Use a brad-point bit in wood or a stubby spotting drill in metal, because a sharp lead point grabs where a standard twist drill would wander. And start at a slow speed with light pressure to let the bit establish the hole before you feed harder.
Throughout, respect the machine. The Occupational Safety and Health Administration’s drill press guidance calls for clamped work, a guarded rotating chuck, and eye protection, and an angled setup makes rock-solid clamping more important than ever, since gravity is now trying to slide your part down the incline.
Comparison: tilting table versus angle vise
Tilting the table uses a bevel your machine may already have, and it handles small parts well, but a tilted table invites sliding and demands careful clamping.
An adjustable angle vise keeps the table flat and stable, clamps the work securely, and repeats a set angle reliably, though it is one more accessory to own and set up.
My verdict: for repeatable angled holes and larger parts, an angle vise on a flat table is the safer, more accurate choice. Reserve table tilting for small parts on a machine with a solid bevel lock, and clamp like you mean it either way.
Conclusion
Angled holes on a drill press come down to one idea: the bit stays vertical, so you angle the work. Tilt the table or tilt the part, clamp it hard, punch the start, and use a bit that resists skating. Do that and the machine drills a clean angled hole as confidently as a straight one.
Key takeaways:
- The spindle stays vertical; you create the angle by tilting the table or the work.
- Rigid clamping matters more than usual because gravity pulls the part down the slope.
- A punched start and a brad-point or spotting drill stop the bit from skating on the angled face.
FAQ
How do I drill an angled hole on a drill press? Tilt the table or the workpiece to the desired angle, clamp firmly, punch the start, and drill with the spindle still vertical.
Should I tilt the table or the part? Tilt the part with an angle vise for larger work and repeatable angles. Tilt the table for small parts if it has a solid bevel lock.
Why does the bit wander on an angled surface? The tip touches one side first and slides downhill, so it needs a punched divot and a sharp lead point to bite.
What bit works best for angled entry? A brad-point in wood or a stubby spotting drill in metal, both of which grab the surface better than a standard twist drill.
How do I keep the part from sliding? Clamp it rigidly to the tilted table or hold it in an angle vise. Never rely on hand pressure.
Can any drill press tilt its table? Many can bevel the table, but not all. Check your machine, or tilt the work instead.
What speed should I use to start? Slow, with light pressure, until the hole is established, then feed normally.
References
- Occupational Safety and Health Administration, Woodworking eTool: Drill Presses (osha.gov)
- WEN Products, drill press vise and accessory documentation (wenproducts.com)


