
How to Drill at an Angle with a Drill Press, Step by Step
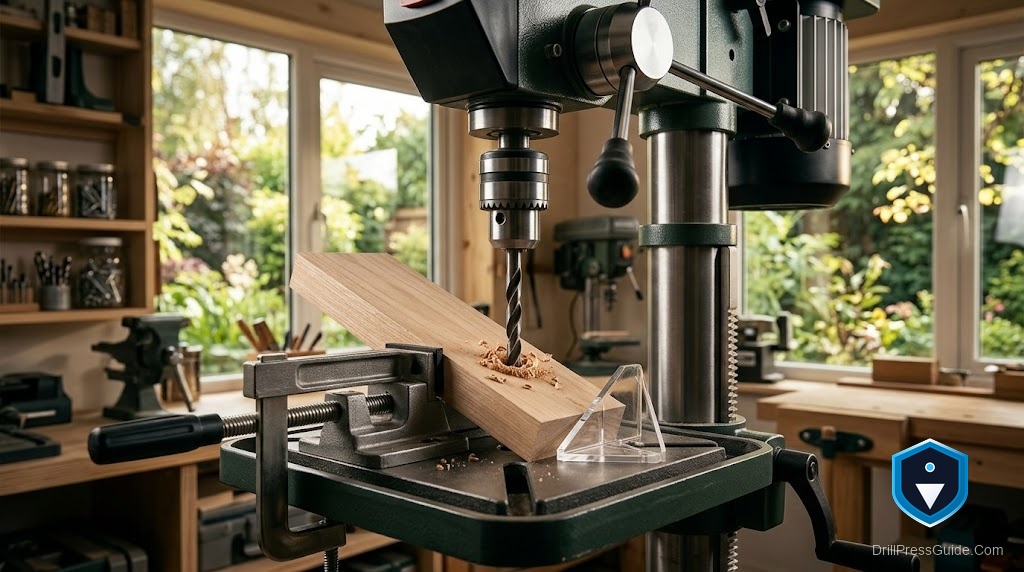
A drill press is built to drill straight down, so the first time you need a hole at forty-five degrees, the machine seems to be working against you. It is not. There are two clean ways to tilt the work relative to the bit, and once you know them, angled holes are as repeatable as vertical ones. The trick is choosing the right method for your workpiece and locking the angle so it does not drift while you drill.
Why angled drilling needs a plan
The drill press feeds the bit vertically and that never changes. To drill at an angle, you tilt the workpiece, not the spindle. That sounds simple until you try to hold a board at a steady forty-five degrees by hand and watch it slip the moment the bit bites. So angled drilling is really a workholding problem: present the work to the bit at a fixed, locked angle, and the machine does the rest exactly as it always does. Every method below is a way to hold that angle securely.
How to drill at an angle with a drill press, step by step
Here is the direct answer, covering the two main approaches:
Method 1: Tilt the table.
- Loosen the table’s bevel lock (most drill press tables tilt on a trunnion).
- Set the angle with a protractor or angle gauge between the table and the bit.
- Retighten the table lock firmly so it cannot shift.
- Clamp the workpiece to the tilted table, ideally against a cleat so it cannot slide downhill.
- Punch a starter mark, then drill with steady feed.
Method 2: Use an angle vise (better for small parts).
- Bolt or clamp an adjustable angle vise to the flat table.
- Set the vise to the angle you want and lock it. A WEN tilting vise tilts from 0 to 90 degrees with positive stops every 15 degrees, so you can dial a repeatable angle and clamp the part in its jaws.
- Seat the workpiece in the jaws and tighten.
- Punch a starter mark and drill.
Both methods keep the bit vertical and tilt the work. The starter mark matters more on an angle because the bit wants to skate downhill on a slope.
Keeping the bit from wandering on a slope
Angled entry is where holes go wrong, because the bit contacts a sloped surface and slides before it bites. Two habits fix this. First, always punch or spot a starter dimple on the mark so the bit tip has a place to sit. Second, for steeper angles, take a light spotting cut at low speed to establish the hole before committing to full feed. A brad-point bit, with its centering spur, also starts far better on a slope than a standard twist bit. Do these and the bit enters on the mark instead of walking down the incline.
Tilting the table versus an angle vise
The two methods suit different work, so it is worth matching them rather than picking a favorite. Tilting the table handles large or long workpieces that would never fit in a vise, and it costs nothing since the table already tilts, but it can be fiddly to set precisely and you must add a cleat so the work does not slide. An angle vise stays on a flat, trustworthy table and grips small parts securely at a repeatable, dialed angle, which is ideal for repeated angled holes in small stock, but it is limited to what fits in the jaws. Use the tilting table for big pieces and the angle vise for small, repeated ones. Between the two, almost any angled hole is covered.
My verdict
Drilling at an angle with a drill press is about holding the work at a locked angle while the bit does what it always does: travel straight down. Tilt the table for large pieces, reach for an angle vise for small or repeated ones, and in both cases punch a starter mark and lock the angle hard before you drill. Do that and angled holes stop being a fight and become just another repeatable setup. The machine was never working against you; it just needed the work presented at the right tilt.
Frequently asked questions
How do you drill an angled hole on a drill press? You tilt the workpiece, not the bit. Either tilt the drill press table to the angle and clamp the work to it, or use an adjustable angle vise on a flat table. Then drill straight down as usual.
Can you tilt the head of a drill press? Generally no. The spindle stays vertical. You create the angle by tilting the table or the workholding, not the head.
How do I stop the bit sliding on an angled surface? Punch a starter dimple on the mark, take a light spotting cut at low speed, and use a brad-point bit whose spur centers itself. These keep the bit from walking downhill.
What is the most repeatable way to drill the same angle many times? An angle vise with positive stops. Set and lock the angle once and every part seats at the same tilt, so repeated holes match.
Do I need to clamp work on a tilted table? Yes, and add a cleat below it. On a slope, gravity and the bit’s grab will slide an unclamped piece. Clamp it and back it up so it cannot move.
How do I set the exact angle? Use a protractor or angle gauge between the table and the bit, or the graduated stops on an angle vise. Confirm with the gauge before locking, since table scales can be approximate.
References
- WEN tilting vise product listing: Check on Amazon
- Woodcraft, Drill Press Table shop guide: https://www.woodcraft.com/blogs/shop-knowledge-guides/drill-press-table
- OSHA Woodworking eTool, Drill Presses: https://www.osha.gov/etools/woodworking/production/machines-tools/drill-press


