
How to Use a Mortising Bit on a Drill Press: A Clear, Shop-Ready Method
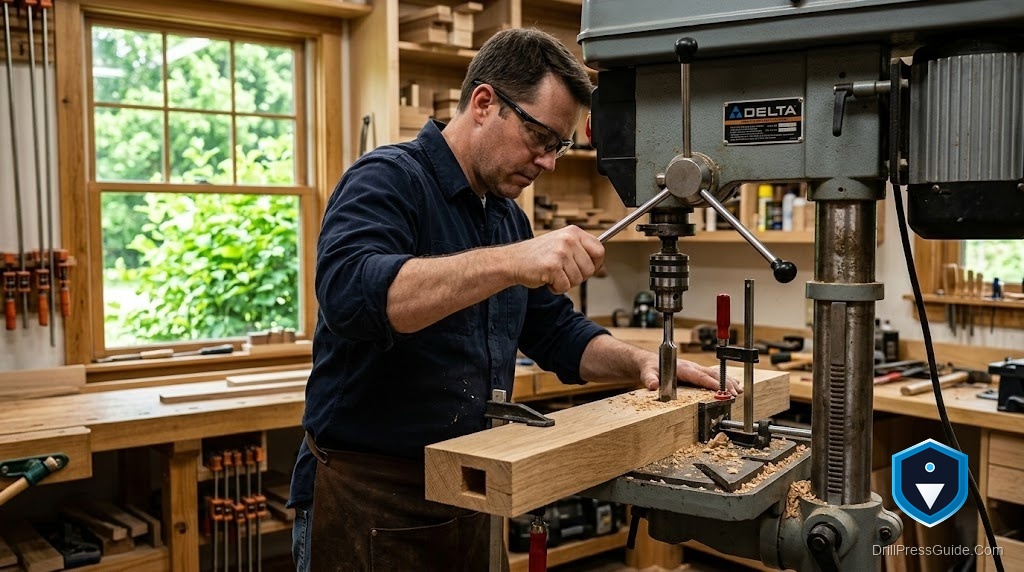
Plenty of woodworkers own a mortising attachment that has cut exactly one ragged mortise before going back in the drawer. The tool got blamed, but the method was usually the problem. Cutting clean mortises on a drill press is a learnable routine, and once the routine clicks, the results are consistent enough that you stop thinking of it as a compromise. This is that routine, laid out plainly.
A mortising bit on a drill press is a hollow square chisel with a drill bit inside it, mounted through an attachment so the press can chop square holes for joinery. The drill removes the middle waste and the chisel squares the corners. Used as a method rather than a gadget, it produces real mortise-and-tenon joints.
Short answer: set the bit just ahead of a sharp chisel, square the chisel to a fence, clamp the work, and cut a row of overlapping plunges, then clean the walls. Keep the pressure moderate and let the chisel do the work, and the mortise comes out crisp.
Set up the tool before the wood
Good mortises start before any wood is under the chisel.
First, confirm the attachment fits your machine, the chisel holder clamping the quill and the fence anchoring to the column or table. Manufacturers publish compatibility for a reason; the Grizzly H7789 kit, for instance, lists the specific presses it fits. Then set the bit-to-chisel clearance: the drill tip should sit slightly below the chisel points, roughly a business card’s thickness, so it clears waste just ahead of the chisel.
A sharp chisel is not optional. The single most common cause of burning and heavy pushing is a dull chisel. Sharpen the interior and the cutting edges, and the tool transforms.
The cutting routine
- Mark the mortise and set the depth stop to the depth you want.
- Square the chisel to the fence so its faces align with the mortise walls.
- Clamp the work to the fence with a hold-down or a 4-inch drill press vise.
- Chop the first hole at one end with steady downward pressure, then let it clear before lifting.
- Move over slightly less than a full chisel width and chop again, working down the mortise in overlapping cuts and leaving thin walls.
- Go back and clean the thin walls with light passes for a straight, flat mortise.
The overlapping-cut order matters. If you try to take a full-width cut right next to the previous one with nothing to steady the chisel, it deflects toward the open hole. Leaving a thin wall and cleaning it after keeps the chisel tracking straight.
Respect what the machine can and cannot do
The honest limitation is the quill. A drill press quill is engineered for straight-down thrust, not the sideways load a mortising chisel puts on it. Push too hard, especially in hardwood, and the quill flexes so the mortise drifts out of square. The fix is not more muscle, it is a sharp chisel and a moderate pace. If the chisel smokes, back off and let it cool.
Because a mortising chisel throws chips and demands firm clamping, eye protection and clamped work are basic practice, exactly as CCOHS advises for drill press work.
Attachment method versus a dedicated mortiser
Against a dedicated benchtop mortiser, the drill press method wins on cost and bench space and loses on rigidity and throughput. If you cut mortises in volume, the standalone machine’s stout quill and long lever pay off. For occasional joinery, the drill press routine is more than enough. You can compare a drill press mortising attachment and hollow mortising chisel set to build your setup.
Who should use this method
If you make furniture, doors, or frames occasionally and own a solid drill press, this routine gives you real joinery without another machine. If your mortising is heavy and daily, invest in a dedicated mortiser and save the drill press for drilling.
Bottom line
Using a mortising bit on a drill press is a routine, not a trick: fit the attachment, set the bit ahead of a sharp chisel, square it to a fence, clamp the work, and cut overlapping plunges before cleaning the walls. Keep the pressure moderate and the results are consistently clean.
- Set the drill tip slightly ahead of a sharp, square chisel.
- Cut overlapping plunges leaving thin walls, then clean them.
- Moderate pressure beats muscle; quill flex is what drifts a mortise.
FAQ
What order do I cut a mortise in? Chop overlapping holes along the mortise, leaving thin walls between cuts, then go back and clean those walls with light passes.
Why does my chisel drift toward the last hole? You are taking a full cut next to an open hole with nothing to steady the chisel. Leave a thin wall and clean it afterward.
How much pressure should I use? Moderate and steady. Forcing the cut flexes the quill and drifts the mortise. A sharp chisel needs far less force.
Do I need a fence and clamp? Yes. A fence aligns the cuts and a clamp or vise keeps the work fixed, which is also the clamping practice CCOHS calls for.
Why is the chisel smoking? Too little clearance or a dull chisel. Increase the bit gap slightly, sharpen the chisel, and let it cool between cuts.
Is a drill press good enough for mortises? For occasional joinery, yes. For heavy or daily mortising, a dedicated mortiser is the better tool.
References
- Grizzly H7789 Mortising Attachment Kit: https://www.grizzly.com/products/grizzly-mortising-attachment-kit-for-drill-presses/h7789
- CCOHS, Metalworking Machines - Drill Presses: https://www.ccohs.ca/oshanswers/safety_haz/metalworking/drillpresses.html
- TEKTON 4-Inch Drill Press Vise Manual: https://media.tekton.com/manuals/manual_53994.pdf


