
Getting Central Machinery 10-Inch 12-Speed Drill Press Column Replacement Right: Fit, Tools, and Final Checks
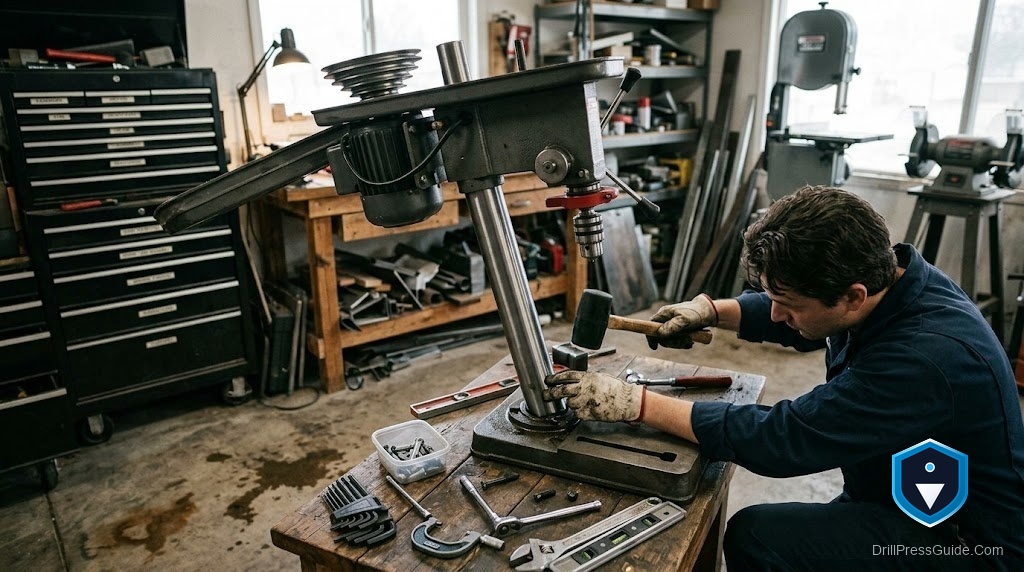
A bent or badly rusted column turns an otherwise good Central Machinery 10 inch 12 speed press into a machine that will not hold alignment, and replacing the column is the fix that brings it back. It sounds like a big job, but on these presses the column is a straightforward tube clamped in the base with the head clamped on top, so the work is mostly careful measuring and squaring rather than anything complex. A Central Machinery 10 inch 12 speed drill press column replacement comes down to matching the tube’s dimensions and squaring the head on reassembly.
The column is the steel tube that connects the base to the head and carries the table. On this press the base clamps the column at the bottom and the head clamps it at the top, while the table rides the column on its collar, so the column’s diameter and length set the fit for everything else.
The direct answer: measure the column’s outside diameter and length, match a replacement tube to those dimensions, then reassemble by clamping the column square in the base and aligning the head so the spindle sits over the table. The final squaring checks are what make the press drill true again.
Measure and match
With the press unplugged and disassembled enough to reach the column:
- Measure the outside diameter of the column tube. The base clamp, head, and table collar all fit this diameter.
- Measure the length so the head sits at the right height and the table travel is preserved.
- Check the base bore and head bore so the new tube clamps firmly in both.
A matching drill press column tube sized to your measurements is the core part. While the table is off, a fresh drill press table with fence is worth considering if the original is worn, and cleaning the column with a rust remover and abrasive pad keeps the table sliding smoothly.
The replacement, step by step
- Unplug the press and lower or remove the head safely, with help for its weight.
- Slide the table and collar off the old column.
- Unclamp the old column from the base and lift it out.
- Seat the new column in the base bore and clamp it, checking it stands square to the base with a square on two sides.
- Refit the table collar and table, then the head, aligning the spindle over the table.
- Clamp the head and confirm nothing shifts.
Final checks
- Square the column to the base on two adjacent sides.
- Check spindle to table alignment by lowering a bit to the table and confirming it meets square.
- Test the table travel up and down for smooth, binding free motion.
Where people go wrong
The first mistake is ordering a column without measuring diameter and length, ending with a tube the base or head will not clamp or that sets the wrong height. The second is dropping the heavy head during removal or refit. The third is clamping the column without squaring it, so the spindle no longer meets the table square and the press drills at an angle.
The verdict
Replacing the column on a Central Machinery 10 inch 12 speed press is really a measuring and squaring job. Measure the diameter and length, match a tube to both, and reassemble with the column clamped square in the base and the head aligned over the table. Support the head’s weight and run the squaring checks before trusting the press. Do that and a machine sidelined by a bent or rusted column drills true again, restored with a tube and an afternoon.
Three takeaways:
- Measure column diameter and length before ordering.
- Support the heavy head during removal and refit.
- Square the column and check spindle to table alignment.
FAQ
How do I replace the column on a Central Machinery 10 inch 12 speed drill press? Unplug and disassemble the press, measure the column’s diameter and length, fit a matching tube clamped square in the base, then refit the table and head aligned over the table.
What column size do I need? Match the outside diameter and length of the original tube, since the base clamp, head, and table collar all fit that diameter and the length sets the head height.
Why does the press drill at an angle after the swap? Usually the column was not clamped square to the base. Recheck squareness on two adjacent sides and confirm the spindle meets the table square.
Do I need to remove the head? Yes, or at least loosen and support it. The head clamps the top of the column, so it must release the tube. Support its weight during the work.
Can I reuse the table and collar? Usually yes, if they match the new column’s diameter. Slide them onto the new tube and check the table moves smoothly.
How do I check alignment when reassembling? Square the column to the base, then lower a bit to the table and confirm it meets square, indicating the spindle sits true over the table.
Should I clean the new column? Keep it clean and lightly protected so the table slides smoothly. Clean any rust off a reused column with an abrasive pad before refitting the table.
References
- Occupational Safety and Health Administration, Woodworking eTool: Drill Presses. https://www.osha.gov/etools/woodworking/production/machines-tools/drill-press
- Canadian Centre for Occupational Health and Safety, Drill Presses. https://www.ccohs.ca/oshanswers/safety_haz/metalworking/drillpresses.html


