
Drill Press Return Spring Repair: The Checks That Prevent a Bad Repair
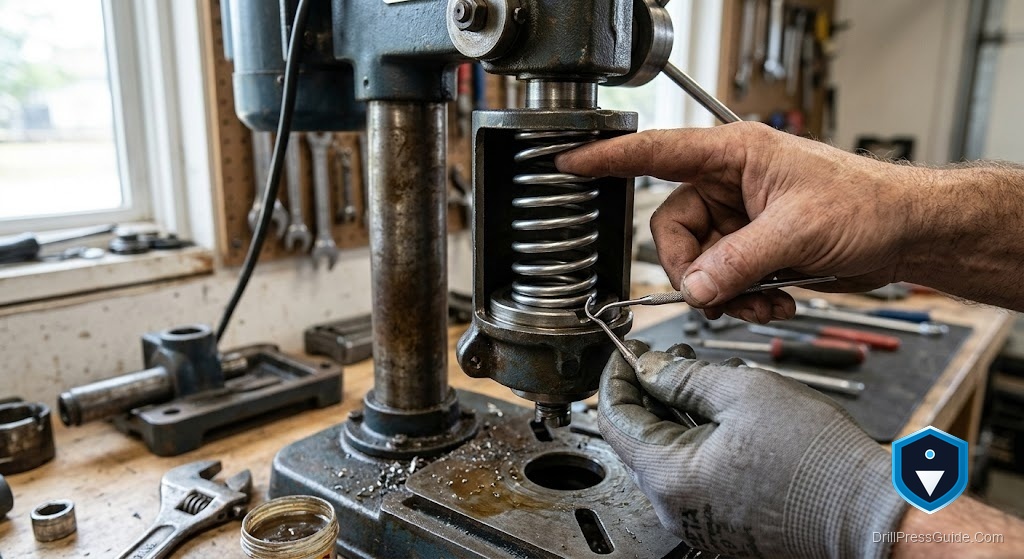
A quill that will not spring back, or a feed handle that kicks when you release it, points at the return spring, and the temptation is to dive straight into the cap. The checks first are what separate a clean repair from a spring that jumps loose across the shop or a quill that still hangs after all the work. Drill press return spring repair goes smoothly when you read the spring’s condition and the cap mechanism before you loosen anything, so you know whether you are retensioning or replacing.
The return spring is a flat, spiral wound spring (a clock type spring) in a cap beside the quill. It returns the quill upward after you feed it down. The cap sets the tension and locks in a notch or on a pin, so all the stored energy lives in that cap.
The direct answer: with the press unplugged, first check whether the spring is broken or just slack, and study how the cap locks, then keep firm control of the cap while you release it, retension or replace the spring, and re engage the notch. The checks tell you which repair you are actually doing before you take on the tension.
The checks before you loosen anything
- Is the spring broken or just slack? A quill that returns weakly may only need retensioning. One that does not return at all often has a broken spring. Determine which before starting.
- How does the cap lock? Identify the notch or pin and the retaining nut or screws, so you know exactly what holds the tension.
- Mark the cap position. Note the starting wind so you can restore or exceed the original tension.
- Have a replacement ready if needed. If the spring is broken, a matching drill press quill return spring saves a second teardown.
The repair, step by step
- Unplug the press and hold the feed handle with the quill partway down.
- Loosen the retaining nut or screws while holding the cap firmly. Never let it spin free.
- Ease the cap out of its notch and let it unwind slowly under control.
- Retension or replace. Reset a good spring, or fit the replacement if it is broken or fatigued.
- Rewind to the marked position (or one notch tighter), seat the cap in the notch, and secure it.
- Test: feed the quill down and release. It should return smoothly and fully.
Wear safety glasses, since the spring is the one part that can move fast.
Where people go wrong
The first mistake is loosening the nut without holding the cap, letting the spring unwind and fly loose. The second is skipping the diagnosis, so a broken spring gets retensioned and still fails, or a slack one gets replaced needlessly. The third is not marking the start position, turning tension setting into blind trial and error.
The verdict
A return spring repair rewards the checks done first. Unplug the press, decide whether the spring is broken or just slack, study how the cap locks, and mark the tension before you touch the nut. Keep firm control of the cap, retension or replace as the diagnosis dictates, and rewind to a smooth return. Wear eye protection. Do the checks, respect the stored energy, and the quill returns crisply again without a spring across the room or a repeat teardown.
Three takeaways:
- Diagnose broken versus slack before you start.
- Control the cap and mark its position before loosening.
- Wear eye protection; the spring can move fast.
FAQ
How do I repair a drill press return spring? Unplug the press, check whether the spring is broken or slack, control the cap while releasing it from its notch, retension or replace the spring, then rewind to a smooth return and secure the cap.
How do I tell if the spring is broken or just loose? A quill that returns weakly usually needs retensioning. One that does not return at all often has a broken spring. Inspect the spring once the cap is controlled and eased out.
Is this repair dangerous? The spring stores energy, so keep firm control of the cap and wear eye protection. Worked deliberately, it is safe.
Do I need a new spring? Only if the old one is broken or fatigued. A spring that is intact but slack usually just needs retensioning at the cap.
How do I set the tension? Mark the start position, rewind to about there (or one notch tighter for a stronger return), seat the cap in its notch, then test and adjust one notch at a time.
Why did my quill still hang after the repair? Usually too little tension was wound back in, or the cap did not seat in the notch. Recheck the wind and notch engagement.
What holds the spring tension? The cap, locked into a notch or on a pin and secured by a retaining nut or screws. That is why controlling the cap is the key to the whole job.
References
- iFixit, How to adjust a quill return spring. https://www.ifixit.com/Guide/How+to+adjust+the+Kinzo+8E116+quill+spring/186701
- Occupational Safety and Health Administration, Woodworking eTool: Drill Presses. https://www.osha.gov/etools/woodworking/production/machines-tools/drill-press


