
Central Machinery 8-Inch 5-Speed Bench Drill Press Setup: How to Do It Right the First Time
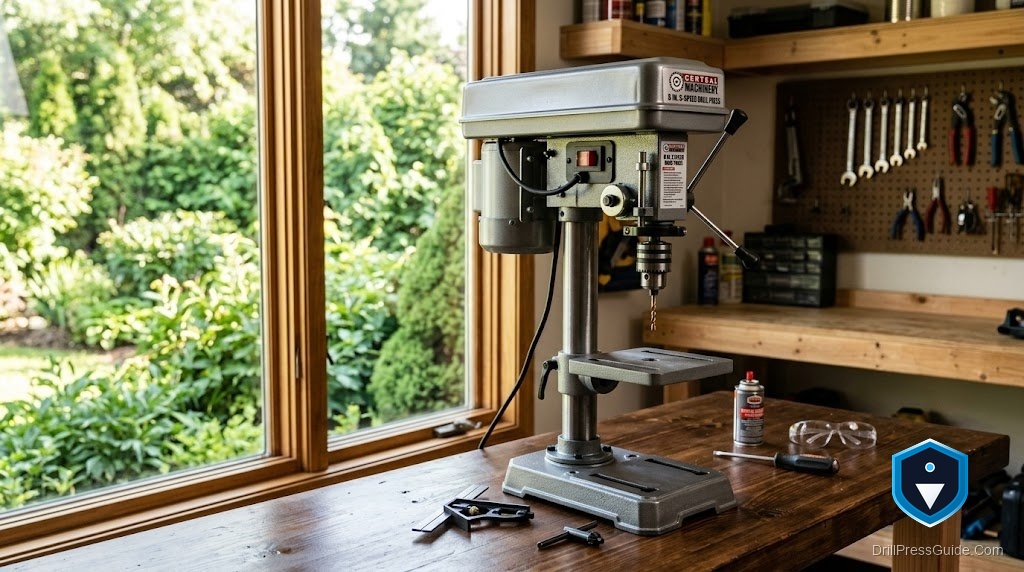
Getting the Central Machinery 8-inch 5-speed bench drill press running correctly takes about an hour if you work methodically. Do it right and the machine will be safe, square, and ready to use. Rush the setup, and you will discover the problems mid-project, usually by drilling a hole in the wrong place. This guide covers every step from the shipping box to your first test hole.
What Comes in the Box
The press ships partially disassembled. You will typically find:
- The base (cast iron)
- The column (steel tube)
- The head assembly (pre-assembled with motor and quill)
- The table with table bracket
- The chuck (may be pre-installed or packed separately)
- Hardware bag (bolts, column set screws, depth stop hardware)
- Chuck key
- Belt tension wrench or hex key
- Owner’s manual
Read the manual before you start. Harbor Freight manuals are brief, but they show the correct orientation of parts and the torque sequence for column bolts.
Step 1: Attach the Column to the Base
Set the base on a stable surface. Lower the column into the base collar. Most versions use a set screw or bolt through the base collar to clamp the column. Do not fully tighten yet. You want the column plumb (perfectly vertical) before locking it.
Use a small level on two perpendicular faces of the column to check vertical alignment. If the column leans, the table and head will tilt with it, and all your holes will be off-angle. Once it reads plumb on both axes, tighten the base collar fastener firmly.
Common mistake: Tightening the base collar before checking plumb. Once fully torqued, adjustment requires loosening and resetting the entire column.
Step 2: Mount the Head Assembly
Slide the head assembly down the column from the top. The rack-and-pinion or collar mechanism on the head grips the column. Guide the head down until it seats near the intended working height, then snug the head locking collar. Do not fully tighten yet; you may need to adjust height once the table is in position.
Common mistake: Dropping the head onto the column without a helper or a catch. The head is heavy. Set up a temporary support block on the base to catch it if your grip slips.
Step 3: Install the Table
Slide the table bracket over the column and tighten the table height locking handle. Position the table at a working height that leaves enough quill travel to drill through typical stock thickness with clearance underneath.
Set the table to zero degrees (horizontal). The tilt indicator on the bracket should read 0. Snug but do not fully lock the tilt adjustment.
Step 4: Install the Chuck
If the chuck is not pre-installed, you need to seat it onto the spindle’s JT33 taper. Clean the taper on the spindle with a dry cloth and remove any oil or machining residue. Clean the interior of the chuck arbor the same way. Oil on a taper joint causes the chuck to seat improperly and work loose under use.
With the taper clean and dry, push the chuck firmly onto the spindle by hand, aligning the taper. Then use a sharp upward strike with a rubber mallet or dead-blow hammer on the base of the chuck to seat it. You should hear and feel the taper lock. Do not use a steel hammer directly on the chuck body.
Common mistake: Relying on hand pressure alone. An unseated chuck will wobble and may eject during use.
Step 5: Square the Table to the Spindle
This is the step most first-time owners skip, and it is the most important one for accurate drilling.
Chuck up a straight piece of drill rod or a machinist’s square. Lower the quill by hand (machine off) until the rod tip is near the table surface. Rotate the spindle slowly by hand and watch whether the tip traces a circle or stays in one spot. If it circles, the table is not square to the spindle axis.
A faster check: place a machinist’s square on the table and bring the quill down to touch the square’s blade. Check for gap between the spindle and the blade on both the front-to-back axis and the left-to-right axis.
Adjust the table tilt until the square reads true on both axes, then lock the tilt adjustment firmly.
Common mistake: Assuming the tilt indicator is accurate. The indicator marks are approximate. Always verify with a physical square.
Step 6: Check Spindle Runout
With the chuck installed and the machine still off, insert a drill bit or a straight rod into the chuck and tighten the chuck key firmly in all three positions around the chuck ring.
Grip the bit near the chuck and try to wiggle it gently. A small amount of play is normal for keyed chucks in this class. Significant wobble suggests either an improperly seated chuck taper or a chuck with worn jaws. Re-seat the chuck and test again. If wobble persists, the chuck itself may need replacement before you drill anything that requires precision.
Step 7: Set the Depth Stop for a Test Hole
The depth stop is the threaded collar and locking nut on the quill stop rod. To set it:
- Lower the quill by hand to the depth you want to drill (with a bit installed and workpiece in place, or just estimating).
- Note where the quill stop contacts the stop rod.
- Thread the stop collar up to that contact point and lock the nut.
Run a test hole in scrap wood. Verify the depth is what you intended and adjust the collar if needed.
Honest Flaw: Casting Flash and Rough Edges
Some Central Machinery 8-inch presses arrive from the factory with casting flash or rough edges on the table surface, the base, or the column collar. Casting flash is a thin fin of excess metal left from the molding process. If the table has flash on its underside edge or around the mounting bracket hole, the table may not rotate freely or seat flat.
Before you decide the machine is defective, run your hand around the table edges and the base collar area. A flat file or a small die grinder with a burr removes flash in a few minutes. This is a known characteristic of the manufacturing tier, not a warranty-level defect.
Safety Checklist Before First Use
Go through this list before every session, not just setup:
- Chuck key is removed from the chuck
- Workpiece is clamped to the table, not held by hand
- Drill bit is the correct type for the material
- Speed (pulley setting) is appropriate for the bit diameter and material
- Belt cover is closed and latched
- Eye protection is on
- Loose clothing and long hair are secured or removed
- Spindle guard is in position if your model includes one
The most common injury on small drill presses is a workpiece spinning free and striking the operator’s hand. Clamp everything.
Who Should Read the Manual
Everyone. The Harbor Freight manual for this machine is short and worth reading completely before starting. It covers the correct belt tension adjustment procedure (which affects how smoothly the machine runs and how long the belt lasts), the depth stop setup, and the table locking sequence. None of this is complicated, but the manual shows the correct order of operations specific to this machine’s geometry.
Comparison: Setup Complexity vs. WEN 4208T
| Step | Central Machinery 8-in | WEN 4208T |
|---|---|---|
| Column to base | Standard | Standard |
| Chuck installation | JT33, seat with mallet | JT33, seat with mallet |
| Table squaring | Required (verify manually) | Required (verify manually) |
| Casting flash risk | Present on some units | Less common |
| Manual quality | Brief but functional | More detailed |
The setup procedure is nearly identical between these two machines. The WEN 4208T tends to arrive with fewer fit-and-finish issues, but the steps are the same.
Conclusion
- Work in order: column to base, head to column, table to column, chuck installation, table squaring, runout check, depth stop calibration.
- Squaring the table to the spindle is the most important step and the one most often skipped.
- Check for casting flash before assuming a fit problem is a defect.
- Run through the safety checklist before every use, not just the first time.
FAQ
In what order should I assemble the Central Machinery 8-inch drill press? Base and column first, then head, then table, then chuck. Square the table and check runout before drilling anything.
How do I seat the chuck correctly? Clean both the spindle taper and chuck bore with a dry cloth, align, and seat with a firm mallet strike upward into the chuck body. Never use a steel hammer directly on the chuck.
How do I square the table to the spindle? Use a machinist’s square or a piece of drill rod in the chuck. Lower the quill by hand and check for gap between the spindle and the square blade on both axes. Adjust the table tilt until it reads true.
What is casting flash and how do I fix it? Casting flash is a thin ridge of excess metal from the casting mold. File or grind it away with a flat file or burr. It takes a few minutes and is normal for this manufacturing tier.
Can I check spindle runout without a dial indicator? Yes. Chuck a straight bit or rod, tighten all three chuck key positions, and gently wiggle the bit near the chuck. Significant wobble is detectable by feel and indicates a seating or chuck problem.
How do I adjust belt tension? Loosen the motor mount bolt on a slotted bracket, slide the motor to increase or decrease belt tension, and retighten. The belt should deflect roughly 1/2 inch under moderate thumb pressure. See your manual for the exact specification.
What speed should I set for drilling wood? Higher speeds (2,000 to 3,100 RPM) work well for small bits in wood. Larger bits (above 1 inch) need lower speeds. Refer to the speed chart in your manual.
Is it safe to hold the workpiece by hand? No. Always clamp the workpiece to the table. A spinning workpiece is a serious injury risk.
What if the table won’t rotate freely after assembly? Check for casting flash around the table bracket collar. File any rough edges. Also verify the locking handle is fully loosened before trying to rotate.
Where can I find the manual for this drill press? Check ManualsLib under “Central Machinery drill press” or the Harbor Freight product page at harborfreight.com using the item number on your machine’s tag.
References
- Harbor Freight Tools product page: harborfreight.com
- WEN Products: wenproducts.com
- OSHA Drill Press Safety: osha.gov
- CCOHS Drill Press Safety: ccohs.ca
- ManualsLib: manualslib.com


