
Drill Press Switch Wiring Diagrams: What to Verify Before Reconnecting Leads
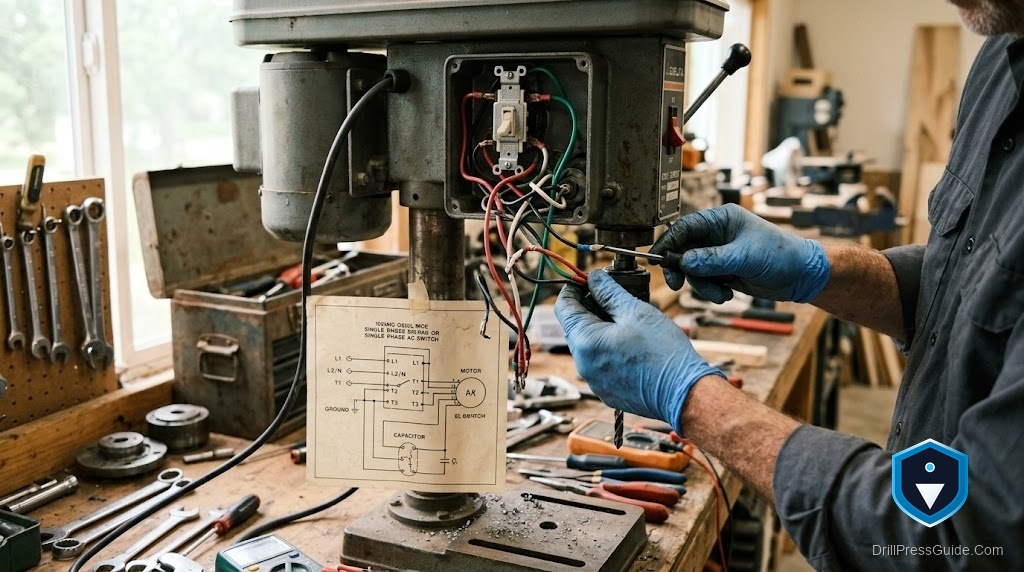
A drill press switch looks simple, but the wiring behind it is the one place on the machine where a mistake can hurt you or ruin a motor. Whether you are replacing a failed switch, chasing a machine that will not start, or rewiring an old Craftsman, Delta, or Duro press, the wiring diagram is your map, and reading it correctly before you reconnect any leads is what keeps the job safe. Here is what to verify before you touch a single wire, and how to find the right diagram for your machine.
Why the wiring diagram matters
A drill press wiring diagram shows how the power cord, the switch, and the motor connect, including any capacitor and, on some machines, the direction of rotation. Get it right and the machine starts, runs in the correct direction, and is safe to touch. Get it wrong and you risk a motor that runs backward, a switch that does not break both legs of the circuit, a shock hazard from an ungrounded frame, or a burned-out motor winding. That is why the diagram is not optional: it is the difference between a safe repair and a dangerous guess. Always work with power disconnected, and if anything is unclear, have a qualified electrician verify the connections.
Find the right diagram first
Before you plan any connection, get the diagram that matches your exact machine:
- Read the ID label. Note the model number, serial number, and manufacture date from the machine’s ID label. On a Craftsman that is the 113-prefix number; on a Delta or Rockwell it is the model and type; on a Duro (for example a Duro W-3080) it is the model on the plate.
- Match the diagram to the machine. A Craftsman 10-inch, a Delta drill press, a Delta-Rockwell (owners cite model references like VC60N13E), and a Duro W-3080 each have their own diagram. Do not use one machine’s diagram on another, since switch and motor wiring differ.
- Use the manual or parts diagram. Pull the wiring diagram from the machine’s manual or the exploded parts view, matched by model number, rather than guessing from a generic diagram.
What to verify before reconnecting leads
With the correct diagram in hand and power disconnected, verify each of these before you connect anything:
- Power disconnected. Unplug the machine and confirm no power is present before touching leads. This is non-negotiable.
- Line, load, and ground. Identify which terminals are line (incoming power), which are load (to the motor), and which is ground. The ground must connect the cord’s ground to the machine frame.
- Switch poles. Confirm the switch breaks the right conductors and matches the diagram’s pole arrangement. A no-volt (restart-protection) switch has its own wiring to verify.
- Motor leads and rotation. Match the motor leads to the diagram, and note any leads that set rotation direction, since some motors can run either way and must be wired for the correct direction (this is where the Delta-Rockwell CCW reference matters).
- Capacitor connections. If the motor has a start or run capacitor, verify its leads against the diagram; a miswired capacitor can prevent starting or damage the motor.
- Wire condition and gauge. Check that the existing wire is sound, correctly sized, and that connections are tight and insulated.
When to call a professional
Be honest with yourself about the work. Basic switch replacement following a clear, matched diagram is within reach of a careful DIYer, but if the diagram is missing, the motor has multiple unlabeled leads, the rotation direction is unclear, or anything about the grounding or capacitor is uncertain, stop and have a qualified electrician verify or complete the connections. Mains wiring is not the place to guess, and a professional check is well worth it against a shock hazard or a ruined motor.
Tooling and supplies
Do the job safely with the right supplies. Confirm power is off with a non-contact voltage tester, make sound connections with quality wire connectors and crimp terminals, and replace a failed switch with a matching drill press power switch. A wire stripper and crimping tool makes clean work. Match the replacement switch’s rating and pole arrangement to your machine before ordering.
The verdict
A drill press switch wiring diagram is the map that makes an electrical repair safe, and the rule is simple: verify before you reconnect. Find the diagram that matches your exact machine by model number (a Craftsman 10-inch, a Delta, a Delta-Rockwell, and a Duro W-3080 each have their own), then, with power disconnected, verify the line, load, and ground terminals, the switch poles, the motor leads and rotation direction, any capacitor connections, and the wire condition. Basic switch replacement from a clear, matched diagram is within reach of a careful DIYer, but call a qualified electrician whenever the diagram is missing or anything about rotation, grounding, or the capacitor is unclear. Work with power off, match the diagram to the machine, and never guess with mains wiring.
Takeaways:
- The wiring diagram maps the cord, switch, motor, capacitor, and rotation; reading it correctly before reconnecting leads keeps the repair safe.
- Find the diagram that matches your exact machine by model number; a Craftsman, Delta, Delta-Rockwell, and Duro W-3080 each differ.
- With power disconnected, verify line/load/ground terminals, switch poles, motor leads and rotation, capacitor connections, and wire condition.
- Basic switch replacement from a clear diagram is DIY-friendly; call a qualified electrician whenever anything is unclear.
FAQ
Where do I find my drill press wiring diagram? In the machine’s manual or exploded parts view, matched by the model number on the ID label. A Craftsman 10-inch, a Delta, a Delta-Rockwell, and a Duro W-3080 each have their own diagram.
Can I use a generic wiring diagram for my drill press? No. Switch and motor wiring differ between machines. Match the diagram to your exact model number, since using the wrong diagram can cause a backward motor, a shock hazard, or damage.
How do I wire a drill press switch safely? Disconnect power first, then, with a matched diagram, verify the line, load, and ground terminals and the switch poles before connecting. Confirm no power with a voltage tester.
Why does my drill press motor run backward? Usually the motor leads that set rotation direction are wired the wrong way. Check the diagram for the rotation leads (the Delta-Rockwell CCW reference is an example) and correct them.
What is a no-volt switch? A restart-protection switch that keeps the machine from restarting on its own after power returns. It has its own wiring to verify against the diagram.
Do I need to connect a ground? Yes. The cord’s ground must connect to the machine frame. A missing ground is a shock hazard. Verify the ground terminal on the diagram.
When should I call an electrician? Whenever the diagram is missing, the motor has unlabeled leads, the rotation direction is unclear, or anything about grounding or the capacitor is uncertain. Mains wiring is not the place to guess.
References
- VintageMachinery.org, drill press wiring diagrams and manuals by manufacturer: http://vintagemachinery.org/pubs/
- OWWM.org, motor and switch wiring identification forums (Craftsman, Delta, Duro): https://owwm.org/
- Delta Machinery, drill press manuals and wiring documentation by model: https://www.deltamachinery.com/support


