
How to Make Your Own Drill Press: What to Check Before You Start
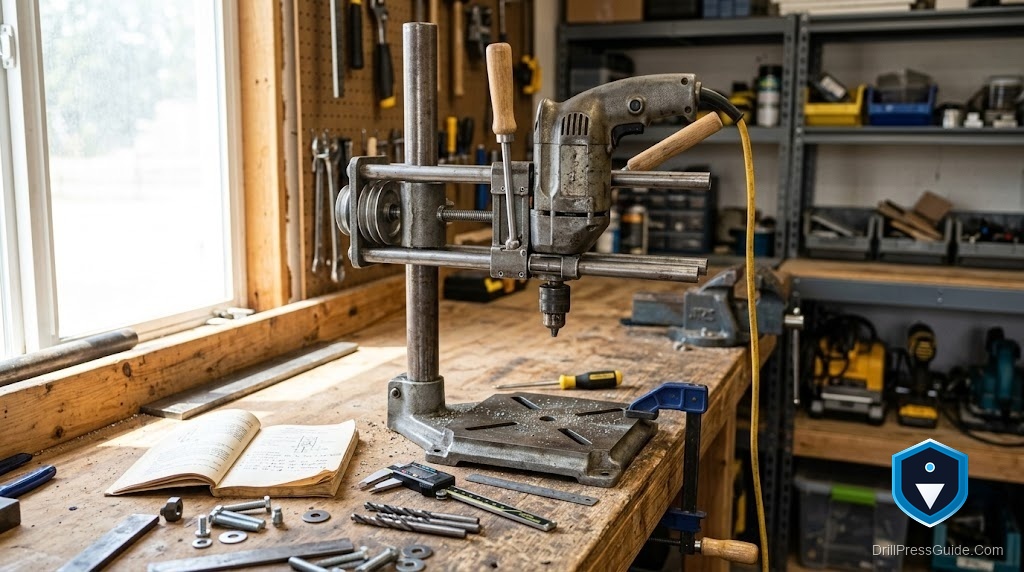
Deciding to make your own drill press is appealing, you get the straight-hole capability of a drill press from a handheld drill and some shop-built structure. But it is a project that rewards thinking before building, because the difference between a homemade drill press that works and one that frustrates comes down to a few things you should check before the first cut. A homemade drill press is really an exercise in rigidity and alignment, so the pre-build checks are where success is decided.
Making your own drill press means building a stand that holds a handheld drill and feeds it straight down into the work, giving the controlled, perpendicular plunge of a drill press. Doing it well means checking, before you start, the drill you will mount, the rigidity your design provides, the straightness of the vertical travel, the squareness of the table, and the honest limits of what the finished tool can do.
Short answer: before you start, check that your drill can be clamped securely, that your design will be genuinely rigid, that the vertical travel will be straight and play-free, that the table can be made square to the drill axis, and that you accept the tool’s limits, light woodworking and hobby work, not heavy or metal drilling. Confirming these up front prevents the flex, wander, and disappointment that ruin rushed builds.
Check the drill you will mount
Start by checking the drill itself, because the whole tool is built around it. Confirm it has a solid, cylindrical part of its body, often the collar behind the chuck, that can be clamped firmly without gripping anything that flexes or covering the vents. Check its size and weight so you can design a holder and slide that carry it. A corded drill with a lockable trigger is often easier to use in a stand than one you must hold on. Checking that your specific drill can be mounted securely and run safely in a stand, before building, avoids designing a stand that cannot actually hold it steady, which is a common early misstep.
Check that your design will be rigid
Rigidity is the single biggest factor in accuracy, so before building, check that your planned base and column will genuinely not flex. A design that looks sturdy on paper can spring under feed pressure, turning straight holes into angled ones. Plan a heavy, flat base that will not tip and a stout column braced solidly to it, and be honest about whether your materials and joints will resist flex. If the design relies on thin stock or weak joints, strengthen it before you start. Checking rigidity at the planning stage is far easier than discovering flex after the tool is built, so scrutinize the structure before committing to it.
Check the vertical travel and the table
Two alignment checks decide whether holes come out straight and square. First, check how the drill will travel straight down: plan a play-free vertical slide, such as linear rails or a close-fitting mechanism, that moves only up and down, perpendicular to the table, with a return spring and a feed handle, and make sure your design has no side play. Second, check that the table can be made flat and set square to the drill’s axis, with a way to adjust or shim it true and to clamp the workpiece. Confirming before you start that your design delivers true vertical travel and a square, clamping table means the finished tool drills accurately rather than merely straight-ish.
Check the limits and plan for safety
Finally, check that you accept what a homemade drill press can and cannot do, because that shapes both the design and how you will use it. It suits light woodworking, hobby work, and small bits; it will not match a real drill press for rigidity, runout, or heavy and metal drilling, and building for those is where it fails or becomes unsafe. Plan for safety from the start: a secure drill mount, guarded moving parts, clamped work so the drill cannot spin it, eye protection, and hands kept clear. Checking the limits and planning safety before you build means you make a tool that is genuinely useful and safe within its honest role.
Conclusion
Making your own drill press succeeds or fails on the checks you do before starting. Confirm your drill can be clamped securely and run safely in a stand, that your design will be genuinely rigid, that the vertical travel will be straight and play-free, and that the table can be made flat and square with the work clamped. Accept the tool’s honest limits, light work, not heavy or metal drilling, and plan safety in from the outset. Do this thinking up front and the build itself is straightforward, producing a homemade drill press that gives far straighter, steadier holes than freehand drilling, which is exactly what makes the project worthwhile.
Frequently asked questions
What should I check before making my own drill press? That your drill can be clamped securely, that your design will be genuinely rigid, that the vertical travel will be straight and play-free, that the table can be made square, and that you accept the tool’s limits.
How do I know my drill can be mounted? Check it has a solid, cylindrical part of its body that can be clamped firmly without gripping anything that flexes or covering the vents, and confirm its size and weight so you can design the holder and slide.
Why check rigidity before building? Because rigidity is the biggest factor in accuracy, and a design that looks sturdy can flex under feed pressure. Confirming the base and column will not flex at the planning stage is far easier than fixing it after.
What alignment matters most? A play-free vertical slide so the drill travels only straight down, perpendicular to the table, and a flat table set square to the drill’s axis with a way to adjust it true.
What are the honest limits? Light woodworking, hobby work, and small bits. A homemade drill press will not match a real one for rigidity, runout, or heavy and metal drilling, and building for those is where it fails.
How do I keep it safe? Plan a secure drill mount, guarded moving parts, clamped work so the drill cannot spin it, eye protection, and hands kept clear, all designed in from the start rather than added later.
References
- OSHA, portable power tool and machine guarding guidance, osha.gov
- Forest Products Laboratory, wood machining references, fpl.fs.usda.gov


