
How to Mill Aluminum With a Drill Press, Step by Step
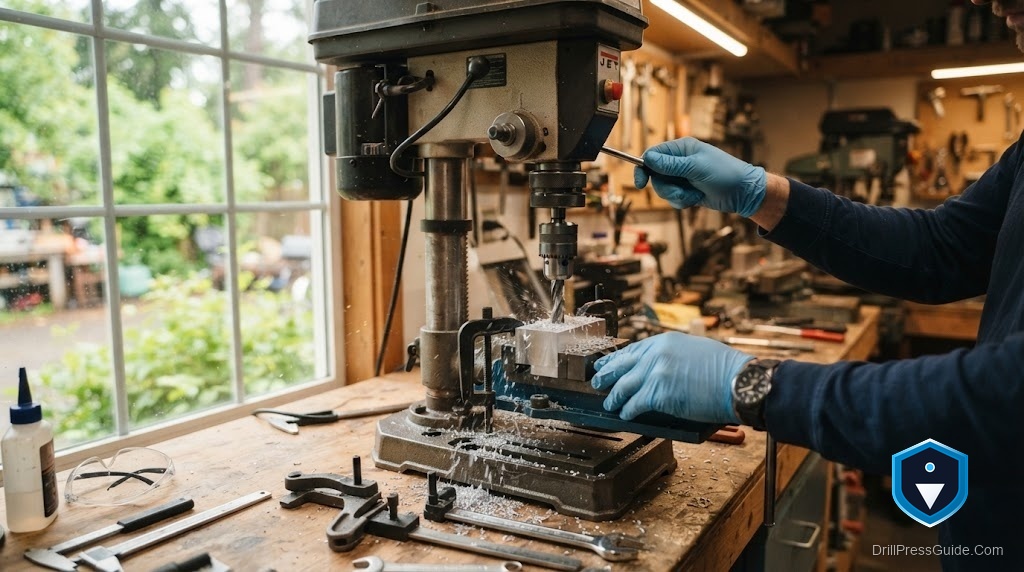
Let me be straight before the steps: a drill press is not a milling machine, and asking it to mill aluminum is asking a tool built for downward thrust to take side loads it was never designed for. That said, with light cuts, a rigid setup, and realistic expectations, you can remove small amounts of aluminum, cut a slot, or true an edge on a press. This guide walks the safe version step by step, and flags clearly where the machine’s limits stop you.
Milling aluminum with a drill press means using end mills and a cross-slide vise to make light side-cutting passes in aluminum, within the tight limits of a spindle built for drilling, not milling. It works for small, shallow work and nothing heavier.
The short answer, up front: use a cross-slide vise, sharp end mills made for aluminum, very shallow cuts, and a moderate speed with lubricant, and keep every pass light. The spindle and chuck are the weak points, so if you feel deflection or the chuck loosening, stop. For real milling, use a mill.
Step 1: Understand and accept the limits
A drill press spindle and its tapered chuck mount are built for downward force, not the sideways load milling creates. Push too hard sideways and the quill deflects, the cut chatters, and the chuck can work loose and drop. So the entire method rests on keeping cuts tiny and loads low. Aluminum is soft enough to make this marginally feasible; steel is not, so this is an aluminum-only technique.
Accept that this is light-duty only. If you need to remove real material or hold a tight tolerance, the press cannot do it, and forcing it risks the machine and you.
Step 2: Set up rigid workholding
Control over the cut comes from a cross-slide vise. A cross-slide compound vise bolts to the table and moves the aluminum in X and Y with crank handles, letting you feed the work into the end mill. Bolt it down solidly and clamp the aluminum firmly in its serrated jaws.
The honest catch is backlash in the vise’s feed screws, so always feed in one direction to take up the play, never reverse into a cut. Bolt the vise to the table rather than trusting friction, because any movement under side load is dangerous.
Step 3: Choose the right cutter and hold it securely
Use an end mill made for aluminum, ideally a two-flute type that clears chips well, and keep it sharp. The serious caution here is the chuck: a standard drill chuck is not designed to grip an end mill against side loads and can let it slip or pull out. Use the smallest end mill the job allows, take the lightest cuts, and watch constantly for any slipping. This is the single biggest weakness of the whole method.
If the end mill shifts in the chuck even slightly, stop; that is the setup telling you it is at its limit.
Step 4: Set speed and add lubricant
Aluminum likes speed. It cuts around 200 to 300 surface feet per minute, so set a moderate to higher speed suited to the end mill’s small diameter. Add cutting lubricant or even WD-40, because aluminum is gummy and welds to a dry cutter, clogging the flutes and ruining the finish. Keep the cutter lubricated through every pass.
A clogged, dry cutter grabs and can pull free, so lubricant here is a safety measure as much as a finish one.
Step 5: Cut light, cut slow, and watch
Take very shallow passes, a small fraction of a millimeter of depth at a time, and feed the cross-slide slowly and steadily in one direction. Let the cutter shave, never force it. Clear chips often, keep the cut lubricated, and stop instantly at any sign of quill deflection, chatter, chuck loosening, or the end mill slipping. Many light passes get you there safely; one heavy pass wrecks the setup.
Wear eye protection, keep hands clear of the cutter, and brush chips away rather than using fingers.
The verdict
You can mill aluminum on a drill press for small, shallow work using a cross-slide vise, a sharp end mill, light passes, moderate speed, and lubricant, but only within tight limits set by a spindle and chuck built for drilling. The chuck’s grip on the end mill is the weak link, and side load is the enemy. Keep every cut light and stop at the first sign of trouble. When the job needs real material removal or accuracy, a milling machine is the right and safer tool, no exceptions.
Keep these in mind:
- This is aluminum-only, light-duty work; a press is not a mill.
- A bolted-down cross-slide vise gives control; feed one direction for backlash.
- A drill chuck grips end mills poorly; use small cutters and watch for slipping.
- Moderate speed, lubricant, shallow passes, and stop at deflection or chatter.
Frequently asked questions
Can you mill aluminum with a drill press? Only for small, shallow work with a cross-slide vise, sharp end mills, light passes, and lubricant. A press is built for downward thrust, not the side loads milling creates.
What do I need to mill aluminum on a drill press? A bolted-down cross-slide vise, end mills made for aluminum, cutting lubricant, and the discipline to take very light passes at moderate speed.
Why is milling on a drill press risky? The spindle and drill chuck are made for downward force. Side loads can deflect the quill, loosen the chuck, or pull the end mill free, which is dangerous.
What speed should I use to mill aluminum? Aluminum cuts around 200 to 300 surface feet per minute, so use a moderate to higher speed for the small end mill, with lubricant to stop gumming.
Can I mill steel this way too? No. Steel’s cutting loads are far too high for a drill press spindle. This light method is only marginally feasible in soft aluminum.
When should I use a real milling machine? Whenever you need to remove real material, hold a tolerance, or cut anything harder than light aluminum. A mill is the correct and safer tool for that.
References
- University of Florida Design and Manufacturing Lab, Speeds and Feeds: https://web.mae.ufl.edu/designlab/Advanced%20Manufacturing/Speeds%20and%20Feeds/Speeds%20and%20Feeds.htm
- Occupational Safety and Health Administration, machine guarding: https://www.osha.gov/machine-guarding


