
Sears Craftsman 15 1/2 Drill Press: What Owners Should Check Before Buying or Repairing
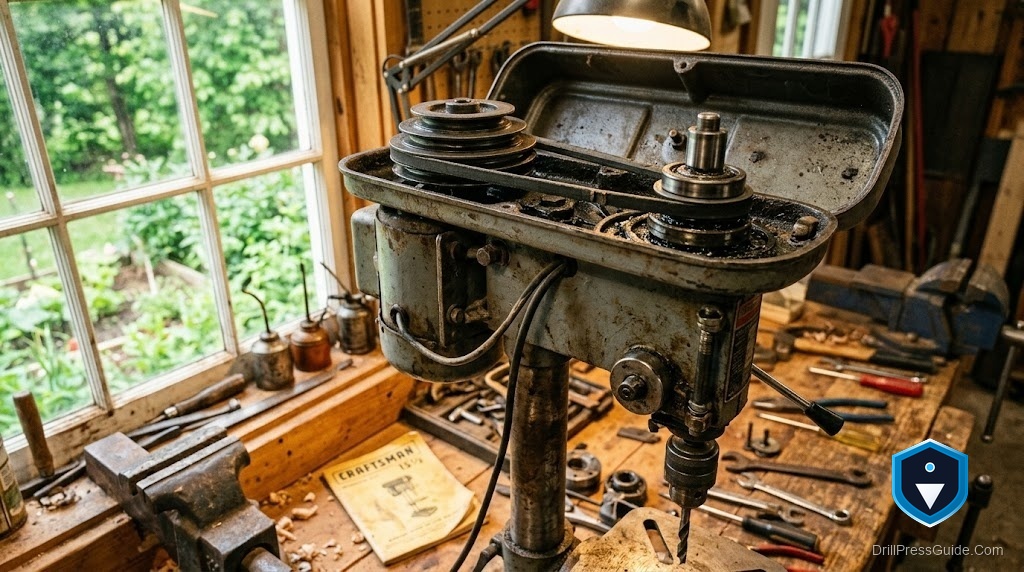
Ask a machinist of a certain age what drill press they learned on, and a fair number will tell you it was a Craftsman. Specifically, a Craftsman they found in their dad’s garage, or a neighbor’s basement, or a shop teacher’s hand-me-down. These machines were everywhere. They were sold through Sears for decades, built to a price but also built to last — and the best of them are still drilling holes today.
The 15½-inch Craftsman drill press from the Sears era is a particular sweet spot in the used-tool market. It’s big enough to do real work, it uses common parts, and it shows up regularly at estate sales for prices that make a new machine look absurd by comparison. But there are things you need to know before you buy one — or before you start tearing into one for a repair.
This guide is specifically about the Sears-era machines, sold under the Craftsman brand while Sears still owned the name. That matters more than you might think.
Sears-Era vs. Modern Craftsman: How to Tell Them Apart
The Craftsman brand today is owned by Stanley Black & Decker, which acquired it from Sears in 2017. SB&D has continued selling Craftsman-branded power tools, including drill presses — but these are entirely different machines from the ones Sears sold, and they have nothing in common in terms of parts, construction, or heritage.
Here’s how to identify a Sears-era Craftsman drill press:
The 113-Series Model Numbers Sears-era Craftsman power tools were cataloged under the 113.XXXXXX model number system. For drill presses, you’ll typically see numbers like:
- 113.213850
- 113.213851
- 113.21384X (various suffixes)
If the model number starts with 113, you have a Sears-era machine.
The Badge Sears-era badges are typically chrome or silver with red Craftsman script lettering. The style is unmistakable if you’ve seen it; post-Sears machines use a different badge design.
Construction Sears-era 15½-inch machines are all cast iron: table, base, head casting. Modern Craftsman presses may use more aluminum and pressed steel in the head. The heft difference is obvious when you move them.
Country of Origin Earlier Sears-era machines were made in the USA. Later ones (1980s–90s) may be Taiwanese manufacture but still sold through Sears under the 113.XXXXX system.
The 15½-Inch Specification
Key specs for the Craftsman 113.213850 (the most common 15½-inch model):
| Specification | Detail |
|---|---|
| Swing | 15½ inches |
| Quill Travel | 3¼ inches |
| Speeds | 12 |
| RPM Range | 250–3,000 RPM |
| Motor | ½ HP, 120V |
| Chuck | JT33 taper, ½-inch capacity |
| Table Tilt | ±45° |
| Table Size | 11” × 11” cast iron |
| Drive Type | V-belt, multi-step pulleys |
The 12-speed configuration gives you much finer RPM resolution than entry benchtop models. This matters when you’re choosing the right speed for a given material and bit diameter — particularly important for metalwork and clean finish cuts.
Parts Sourcing for Sears-Era Machines
Your parts sources, ranked:
-
eReplacementParts.com — This is currently the most reliable source for 113-series Craftsman parts. They have diagrams, exploded views, and actual inventory.
-
eBay — For harder-to-find parts (original quill assemblies, original tables, specific pulley sets), eBay parts-machine listings are your friend.
-
Sears PartsDirect — Still worth checking, but inventory has become unpredictable.
-
Generic equivalents — Bearings, belts, and arbors are generic industrial components. Measure carefully and order from any bearing supplier.
Generic parts that apply directly to this machine:
- Belts: 4L-series V-belt, length varies by configuration. A link belt is an excellent upgrade — link belts are endlessly adjustable in length, which matters when pulleys are slightly worn or have been replaced with non-original sizes.
- Chuck: JT33 taper. If your original chuck is damaged or worn, a replacement JT33 keyed chuck drops right in.
- Chuck key: If yours is missing, a properly sized replacement chuck key is cheap and essential.
Pre-Purchase Inspection Checklist
You’re at the estate sale. The machine is in the corner. Here’s what to do before you write a check.
Column and Base
- Sight down the column: Look for straightness. A bowed column means everything you drill will be off-axis. Walk away.
- Check the base bolts: The column should be rigidly attached. Rock the column gently; it should not move.
- Look for cracks: Particularly at the table bracket and base casting. These are stress points.
Table
- Flatness: Bring a small machinist’s rule or straightedge. A flat table is non-negotiable for accurate work.
- Tilt mechanism: Crank the table to 45° and back. Should move freely and lock positively.
- Table clamp: Should hold the table firmly when locked, with no creep under load.
- Surface rust: Cosmetic. Clean it up with a wire wheel, 220-grit wet/dry sandpaper, and a coat of paste wax.
Quill
- Movement: Pull the quill down by hand and release. It should descend smoothly and spring back firmly. Stiction or grinding indicates worn or damaged quill bushings.
- Side play: Grab the chuck body and try to move it laterally. A small amount of play is normal; excessive movement means the quill bushing is worn.
- Depth stop: Lock it, pull the quill down to the stop, apply firm pressure. It should not creep.
Drive System
- Belt condition: Look for cracking, glazing, fraying, or oil contamination. Plan on replacing the belt regardless; budget $10–20.
- Pulley alignment: Sight across the pulley stack. Pulleys should be coplanar. Misalignment causes belt wear and vibration.
- Pulley wobble: Spin each pulley by hand with the belt removed. Look for wobble or lateral play that would indicate a loose set screw or worn bore.
- Motor pulley: Check the set screw. These loosen with vibration over decades. A loose motor pulley is a common cause of belt jumping and speed inconsistency.
Bearings
- Spindle bearings: Chuck in a straight shank and put a dial indicator against the shank just below the chuck jaws. Under 0.005” runout is acceptable for general work; under 0.003” for metalwork.
- Motor bearings: Run the motor briefly. Listen for grinding, squealing, or rough-running. Smooth and quiet is good.
Electrical
- Cord condition: Check for cracked insulation, particularly at the cord entry point and the plug.
- Switch operation: Should operate cleanly with no arcing, sparking, or intermittent behavior.
Common Failure Points
1. Belt Hardened, cracked belts are almost universal on machines this age. Replace immediately. A link belt is worth the slight premium — it handles small misalignments that would chew up a traditional V-belt, and it virtually eliminates vibration transmission.
2. Quill Spring The quill return spring lives inside the quill housing. Over decades, springs fatigue and break. Symptoms: quill doesn’t return fully, or returns too slowly. Replacement springs are available from eReplacementParts.com with your model number.
3. Chuck The original chuck may have worn jaws, a damaged arbor seating, or excessive runout. Test it before accepting the machine. Replacement is straightforward: a sharp tap with a wooden block driven upward through the spindle frees the arbor, and a new JT33 chuck mounts in minutes.
4. Center Pulley Retaining Ring The multi-step pulley stack on 12-speed models uses a retaining ring (snap ring) to secure the center pulley on its shaft. These can fail, allowing the pulley to slide and belt tension to disappear.
5. Motor Bracket / Motor Mounts The motor mounts on rubber isolators that absorb vibration. After decades, the rubber deteriorates and the motor shifts position, throwing off belt alignment. Replacement rubber mounts are generic.
6. Depth Stop The depth stop mechanism on these machines uses a simple threaded stop with a locknut. The threads can strip or the stop can bend from abuse.
7. Ball Bearings Spindle bearings are deep-groove ball bearings in standard dimensions. Replacement requires disassembly of the head but is well within DIY capability if you have a bearing puller and an arbor press.
Belt and Chuck Replacement: Step by Step
Belt replacement:
- Remove the belt cover (usually two or four screws).
- Loosen the motor mounting bolts or tensioner to release belt tension.
- Remove the old belt.
- If using a link belt, thread it through the pulley groove and snap the links together to the exact tension you need. No tools required.
- If using a traditional V-belt, confirm length before ordering. Route over pulleys and restore motor tension.
- Test spin by hand before powering up.
Chuck replacement:
- Remove the existing chuck: insert a wooden drift through the spindle bore from above and strike sharply downward. The Jacobs taper will release.
- Clean the taper bore in the spindle with solvent and a clean rag.
- Align the new JT33 chuck in the taper bore.
- Strike the chuck sharply upward (a wooden block against the chuck body) to seat the taper. It should seat firmly.
- Test for runout with a dial indicator.
Comparison Table
| Feature | Craftsman 113.213850 | Craftsman (SB&D Current) | Jet JDP-17 |
|---|---|---|---|
| Swing | 15½” | 15” | 17” |
| Speeds | 12 | 16 | 12 |
| Table Material | Cast iron | Cast iron | Cast iron |
| Motor | ½ HP | ½ HP | ¾ HP |
| Era | Sears / pre-2017 | Post-2017 | Current |
| Parts Source | eReplParts / eBay | Manufacturer | Manufacturer |
| Price (used) | $100–$300 | $200–$400 | $400–$600 |
| Country of Origin | USA / Taiwan | China | Taiwan |
| Build Quality | High | Moderate | High |
FAQ
Q: How do I know if my drill press is a Sears-era Craftsman? A: Look for a model number beginning with 113. That’s the Sears catalog system. Post-2017 SB&D Craftsman presses use a completely different numbering format.
Q: Are parts for the 113.213850 still available? A: Many parts are still available through eReplacementParts.com. For obsolete or unavailable parts, eBay parts-machine listings and the OWWM.org community are your best bets.
Q: What belt does the Craftsman 15½-inch drill press use? A: A 4L-series V-belt. Confirm the length by measuring your existing belt or the pulley center-to-center distance. A link belt is an excellent upgrade that eliminates measuring uncertainty and cuts vibration.
Q: My quill doesn’t spring back — what’s wrong? A: Most likely a fatigued or broken quill return spring. Order by model number from eReplacementParts.com. This is a moderately involved repair that requires removing the quill housing cover.
Q: The chuck has a lot of wobble. Is it the chuck or the bearings? A: First, check if the chuck is seated firmly on the arbor — a loose arbor causes dramatic runout. If the arbor is seated, chuck up a precision ground rod and run the indicator further up, close to the quill face. Runout that decreases as you move the indicator up toward the spindle suggests a chuck problem; runout that stays consistent suggests a bearing problem.
Q: What chuck does the Craftsman 15½ drill press use? A: JT33 (Jacobs Taper #33), ½-inch capacity. Direct replacement chucks are widely available — see a quality JT33 keyed chuck here.
Q: My chuck key is missing. What size do I need? A: The original chuck key for most Craftsman 15½-inch drill presses is a 5/16” pilot, ½” square drive. A universal replacement chuck key in the right size will work fine.
Q: Is it worth adding a vise to a Craftsman floor drill press? A: Absolutely, for any metal drilling. A drill press vise bolted to the table slots keeps your workpiece from spinning if the bit catches.
Q: Can I add an LED work light to an older Craftsman drill press? A: Yes, and you should. A magnetic LED work light mounts to the column or head and can be repositioned to light your exact drilling point.
Q: How much should I pay for a used Craftsman 113-series 15½-inch drill press? A: In good, running condition: $150–$250. For a clean, well-maintained example with recent belt and chuck: up to $300 is reasonable. Anything over $300 for an unverified estate sale find is too much — walk away or negotiate hard.
SEO Metadata


