
How to Put a Chuck on a Drill Press: Setup, Checks, and Common Mistakes
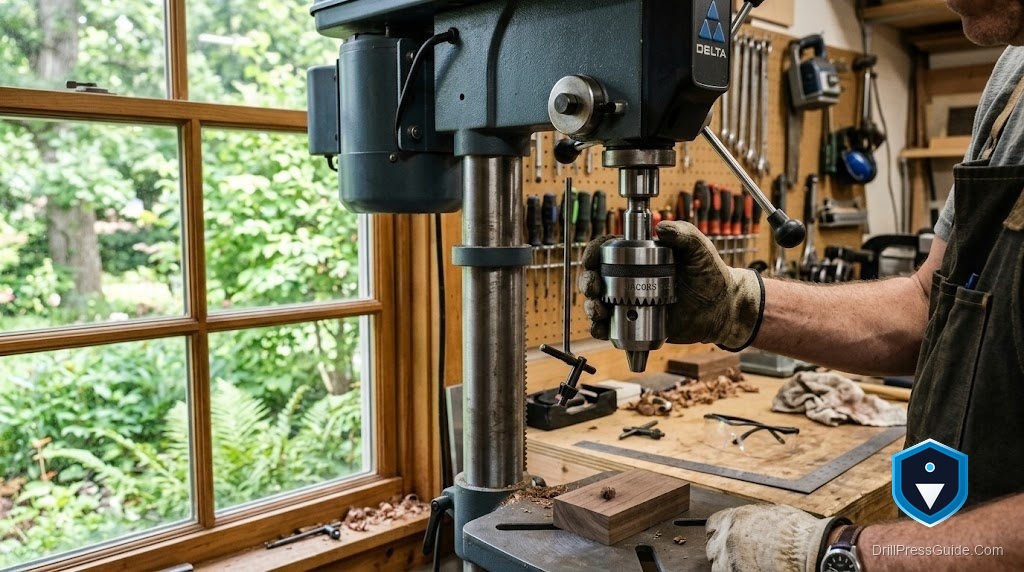
A new chuck arrives, you go to install it, and you realize nobody explained the one thing that actually matters: the chuck does not screw on or bolt on. It holds by a friction taper, seated with a firm push, and if you do it wrong the chuck either wobbles or falls off mid-cut. The good news is that doing it right takes about a minute once you understand the taper. The bad news is that most people learn the taper by getting it wrong first.
What holds a drill press chuck on
A drill press chuck stays on by a matched taper, not threads. There are two tapers in play, and you need to know which yours uses:
- The arbor-to-spindle taper. The chuck mounts on an arbor, and the arbor seats into the spindle with a Morse taper, commonly MT2 on benchtop machines. Metal grips metal by friction along the cone.
- The chuck-to-arbor taper. The chuck itself slides onto the small end of the arbor with a Jacobs taper, often JT33. Same idea, smaller cone.
Some chucks come already fitted to an arbor; some are sold as a chuck and arbor you assemble. Either way, the principle is identical: clean, dry, matching tapers pressed firmly together hold with surprising strength, and any oil, grit, or mismatch makes them let go.
How to put a chuck on a drill press, step by step
Here is the direct answer:
- Unplug the machine. Every install and removal happens with the power off.
- Identify your taper. Check the manual or the spindle for the Morse taper size (MT2 is common) and the chuck’s mount (JT33 is common). The chuck and arbor must match both your spindle and each other.
- Clean both tapers bone dry. Wipe the spindle bore, the arbor, and the chuck’s socket with a clean rag. Remove all oil, grease, and grit. A taper only grips clean, dry metal. Do not lubricate it.
- Assemble the chuck onto the arbor (if separate). Open the chuck jaws fully so nothing protrudes, stand the arbor small-end-up in the chuck socket, and press the two together by hand to start the seat.
- Seat the arbor into the spindle. Line up the arbor’s Morse taper with the spindle bore and push it home.
- Set the taper with a firm tap. With the jaws fully closed (or a wood block under the chuck to protect the jaws), give the bottom of the chuck one firm tap straight up with a non-marring mallet, or press it up hard against a wood block on the table. The taper snaps into place.
- Test it. Spin by hand and confirm the chuck runs true and does not wobble. Plug in and run at low speed briefly to confirm.
That is the whole job. The two mistakes that ruin it are lubricating the taper and failing to seat it firmly.
Choosing the right chuck and arbor
Before you install anything, match the parts to your machine. If your spindle takes an MT2 arbor, a keyed chuck like the WEN LA164K 5/8-inch keyed chuck with MT2 arbor drops in without extra fitting and grips bits up to 5/8 inch. If you prefer keyless operation and your spindle uses a JT33 mount, a KIPA keyless JT33 chuck with an MT2-to-JT33 arbor lets you change bits by hand and includes the arbor to reach an MT2 spindle. Match the arbor to your spindle first; the chuck’s bit capacity is the second decision.
Keyed versus keyless chucks
Since you are installing a chuck, it is worth knowing which type to install. A keyed chuck uses a toothed key to clamp the jaws, which gives a very firm, no-slip grip that holds large bits and takes hard drilling without loosening. A keyless chuck tightens by hand, so bit changes are faster and you never lose a key, but it can loosen under heavy load or with big bits. For a drill press that drills a lot of metal or runs large bits, the keyed chuck’s grip is the safer choice. For a wood shop doing frequent bit changes with modest bits, the keyless chuck’s convenience usually wins. Both install by the same taper method; only the tightening differs.
My verdict
Putting a chuck on a drill press is a taper job, not a threading job: match the arbor to your spindle, clean both tapers until they are dry and bright, seat them firmly with one solid tap, and test for wobble. Never oil a taper and never trust a chuck you did not seat with a real push. Get those right and the chuck holds like it grew there. Get them wrong and it will remind you at the worst possible moment.
Frequently asked questions
How does a drill press chuck attach? By a friction taper, not threads. The chuck mounts on an arbor with a Jacobs taper (often JT33), and the arbor seats into the spindle with a Morse taper (often MT2).
Do you need to tap the chuck on? Yes. After seating the tapers by hand, one firm tap straight up with a non-marring mallet, or a hard press against a wood block, locks the taper. A gentle push alone is not enough.
Should I grease the chuck taper? No. A taper grips only clean, dry metal. Oil or grease lets it slip and fall off. Wipe both surfaces completely dry before seating.
What taper does my drill press use? Many benchtop machines use an MT2 spindle taper with a JT33 chuck mount, but check your manual. The arbor must match your spindle, and the chuck must match the arbor.
How do I take a chuck off a drill press? Extend the quill and lock it, then drive a taper drift (a flat wedge) through the slot in the spindle to break the arbor’s Morse taper. The chuck drops free, so support it.
Why does my chuck keep falling off? Almost always a dirty or oiled taper, or one that was never seated firmly. Clean both tapers dry and re-seat with a solid tap. A damaged taper may need replacing.
References
- WEN LA164K keyed drill chuck product page: https://wenproducts.com/products/wen-la164k-5-8-inch-keyed-drill-chuck-with-mt2-arbor-taper
- WEN DPA167H keyless JT33 drill chuck product page: https://wenproducts.com/products/wen-dpa167h-heavy-duty-jt33-keyless-drill-press-chuck-with-1-64-to-5-8-inch-capacity
- OSHA Woodworking eTool, Drill Presses: https://www.osha.gov/etools/woodworking/production/machines-tools/drill-press


