
How to Remove Drill Press Chuck Without Tool: A Clear, Shop-Ready Method
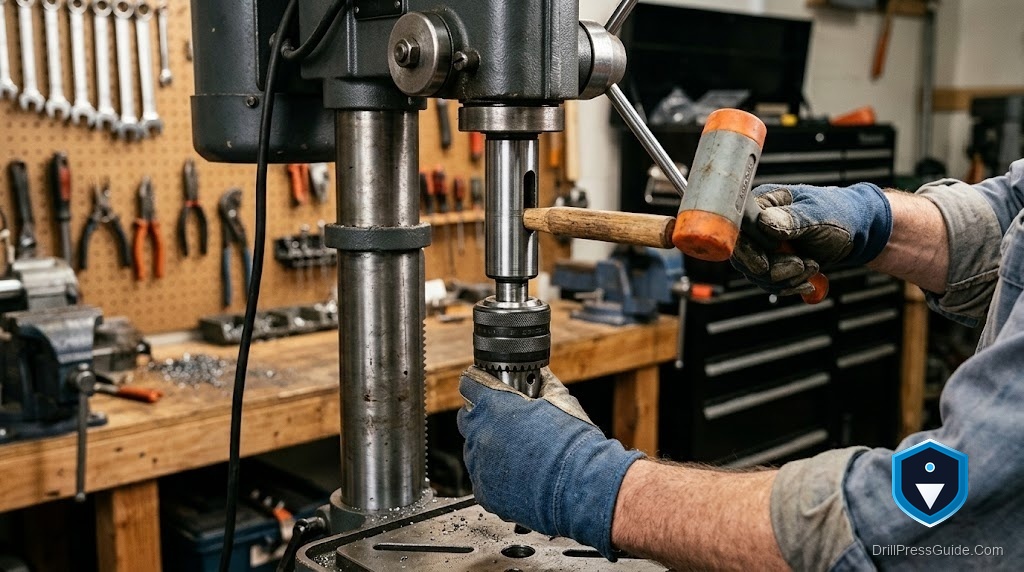
It is Sunday, the store is closed, and the chuck has to come off now. You do not own a wedge set or a taper drift, and the internet is full of people swearing you must have them. You do not, at least not always. Removing a drill press chuck without the dedicated tools is possible with things already on your bench, as long as you respect what you are doing and do not turn a repair into a dented chuck and a bent arbor.
Removing the chuck means breaking the taper that holds it, either the Jacobs taper between chuck and arbor, or the Morse taper between arbor and spindle. Without the proper tools you improvise the same axial force those tools deliver, using wood, wrenches, and gravity instead of a wedge and a drift.
The direct answer: check for and remove any internal retaining screw first, then break the taper using improvised wedges (two flat wrenches or hardwood shims) or by supporting the chuck and driving the arbor down through the spindle slot with a punch and a soft mallet. Keep every force along the axis, and accept that if it fights you, the right tool is worth it.
Safety first, because this is where it bites
Unplug the press. Every method below assumes the machine cannot start. A chuck under a hammer with the power live is how people get hurt, and machine shop safety guidance is unanimous on unplugging before any adjustment or repair.1
Step zero: find the retaining screw
Open the jaws fully and look down the bore. If there is a screw at the bottom, that screw holds the chuck onto the arbor, and no amount of tapping will free the chuck until it is out. It is often reverse threaded, so try turning it clockwise. Miss this and every method below fails.
Method 1: improvised wedges (chuck off arbor)
- Open the jaws fully.
- Slip two flat, open end wrenches (or two hardwood shims) into the gap between the chuck top and the arbor collar, one on each side.
- Gently tap the wrenches inward, alternating sides, or squeeze them in with a clamp. The even sideways pressure at the collar pops the taper without hitting the chuck.
Method 2: the wood block and punch (arbor out of spindle)
- Extend the quill to expose the spindle access slot.
- Set a wood block on the table under the chuck to catch it.
- Put a punch, a bolt, or a hardwood dowel into the slot against the arbor tang and tap it with a soft mallet. The arbor drops onto the block.
Method 3: the drop (last resort, light chucks only)
Some will suggest opening the jaws, holding a wood block under the chuck, and giving the feed a sharp motion to shock the taper loose. This can work on light presses, but it risks the chuck falling on the table or your hand, so keep the block and your body clear, and use it only when nothing else is on hand.
Honest limits of the no tool approach
Improvised methods work best on chucks that were seated with normal force and kept clean. A chuck that has been on for decades, or was oiled and then rusted onto the taper, may simply not yield to wrenches and wood. At that point stop before you damage something, and pick up a drill chuck removal wedge set or a taper drift. They are worth having and save the chuck. A soft dead blow mallet is worth having either way, because it drives parts without denting them.
Where people go wrong
The first mistake is skipping the retaining screw check and beating on a bolted chuck. The second is striking the chuck body directly, which dents it and bends the arbor. The third is grinding away for an hour on a seized taper when a proper wedge set would have solved it in one tap.
The verdict
You can remove a drill press chuck without the dedicated tools, and often should when the store is closed and the chuck is not badly seized. Unplug the press, pull any retaining screw, and break the taper with improvised wedges or a punch through the access slot, always along the axis. But know the limit: a stubborn, rusted, or decades old taper deserves the right tool, and that tool is common enough that fighting it by hand is false economy.
Three takeaways:
- Unplug first, then check for a retaining screw.
- Improvise the wedge or drift, but keep every force axial and off the chuck body.
- If it truly fights you, stop and buy the proper wedge set rather than damage the chuck.
FAQ
Can I remove a drill press chuck without special tools? Often yes. After removing any retaining screw, break the taper with improvised wedges (two wrenches or hardwood shims) or drive the arbor out with a punch through the spindle slot. Keep force along the axis.
What household items work as chuck wedges? Two flat open end wrenches or hardwood shims slid into the gap at the arbor collar, tapped or clamped in evenly, mimic a wedge set.
How do I get the arbor out without a taper drift? A punch, a bolt, or a hardwood dowel in the spindle access slot, tapped with a soft mallet, drives the arbor out onto a wood block.
Is it safe to shock the chuck loose with the feed lever? Only on light presses and as a last resort, with a block under the chuck and your hand clear, because the chuck can fall. Safer methods come first.
Why will my chuck not come off no matter what? Usually an unremoved retaining screw or a seized, rusted taper. Recheck for the screw, and if the taper is seized, use a proper wedge set.
Do I need to unplug the press? Yes, always. Never work on the chuck with the power connected.
When should I just buy the tool? When improvised methods do not budge the taper after a few careful tries. A wedge set or drift is worth having and prevents damage.
References
- Emory University EHS, Drill Press Safety Rules. https://ehso.emory.edu/sso/documents/content-guidelines/drillpresssafetyrules.pdf
- Occupational Safety and Health Administration, Woodworking eTool: Drill Presses. https://www.osha.gov/etools/woodworking/production/machines-tools/drill-press
Footnotes
-
Emory EHS and OSHA drill press safety guidance: unplug before adjustment or repair. ↩


