
A Practical Guide to Ryobi Drill Press Chuck Replacement
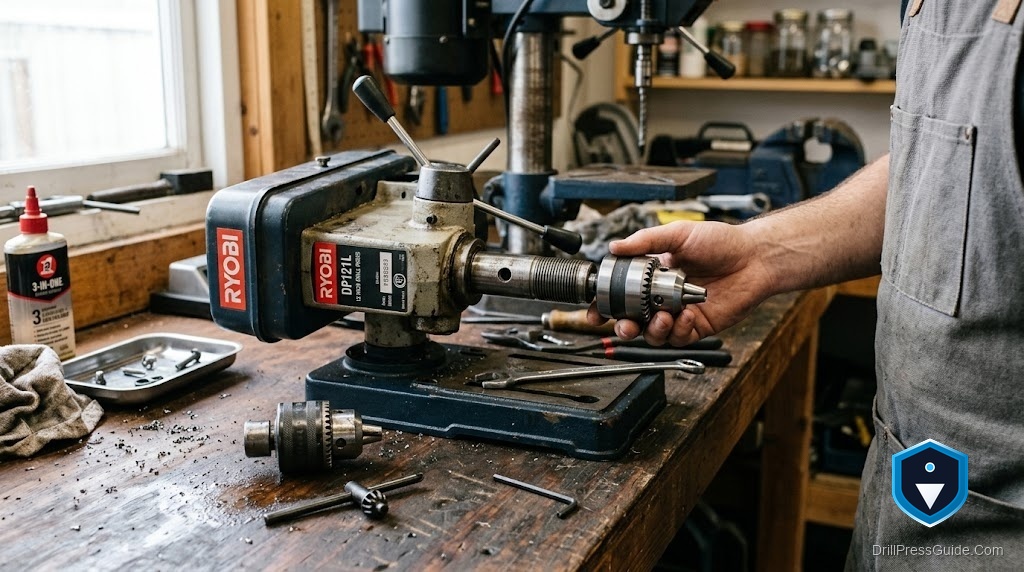
Ryobi presses are the tool a lot of people learn on. They are the ones that show up in first garages and school shops, and they take a beating. So when the chuck gives up, letting bits spin or refusing to close on a small drill, it is often someone’s first real repair. A Ryobi drill press chuck replacement is a great first repair to own, as long as you match the new chuck to the arbor and do not fight the old one off with the wrong technique.
Replacing the chuck means removing the worn chuck from its arbor and fitting a new chuck that matches your taper. On Ryobi benchtop presses, including the common DP series, the chuck mounts to a Jacobs taper arbor that sits in the spindle on a Morse taper.
The direct answer: identify the Jacobs taper on your arbor and the Morse taper of the spindle, then buy a chuck to match. On small Ryobi presses these are usually modest, common sizes, but confirm yours before ordering.
Confirm the tapers
Two numbers set the whole job:
- Jacobs taper (chuck to arbor). The short taper the chuck grips, often JT33 on machines in this class.
- Morse taper (arbor to spindle). The longer taper in the spindle, commonly MT2 on benchtop units.
Check the manual or the arbor stamp. If replacing only the chuck, match the Jacobs taper. If the arbor is worn, buy a matched JT33 to MT2 chuck and arbor set.
Is the chuck actually the problem?
Ryobi chucks sometimes get blamed for sins they did not commit:
- Chips packed in the jaws can stop them closing. Blow it out first.
- A worn or wrong key can mimic a slipping chuck. Try a known good key.
- A set screw backing out inside the chuck can let it loosen on the arbor. Check for one before replacing.
If the jaws still will not grip after cleaning and a good key, the chuck is done.
Removing the old chuck
- Unplug the press.
- Open the jaws fully so nothing gets damaged.
- Check for a retaining set screw inside the chuck (jaws open, look down the bore). If present, remove it, since it can be reverse threaded.
- Drive the chuck off its taper using chuck removal wedges tapped in evenly from both sides. On light Ryobi units, support the quill so you are not driving through the bearings.
Installing the new chuck
- Wipe both tapers bone dry. No oil.
- Open the jaws, set the chuck square on the arbor, and seat it with a straight axial push against a wood block.
- Chuck a straight pin and indicate the runout with a dial indicator. A few thousandths is fine for a press in this class.
Keyed or keyless
On a light duty Ryobi, a keyless drill chuck is a genuinely nice upgrade, because most owners run smaller bits where keyless grip is plenty and the convenience is real. A keyed chuck still makes sense if you push the press with larger bits than it was really built for. Match either to your Jacobs taper.
Where people go wrong
The first mistake is missing the internal set screw and beating on a chuck that is still bolted on. The second is buying by “Ryobi” alone when the taper is what matters. The third is oiling the taper, which lets the new chuck creep off a lightweight spindle that never had much holding force to spare.
The verdict
A Ryobi chuck swap is an ideal first repair: quick, forgiving, and satisfying if you follow the order. Check for a set screw, drive the old chuck off with wedges, seat the new one dry and straight, and indicate it. Keyless is a smart upgrade for the small bit work these presses do best. Just respect the light build and let the wedges, not brute force, do the work.
Three takeaways:
- Look for an internal set screw before driving the chuck off.
- Match the chuck to the Jacobs taper, not the brand.
- Keyless is a worthwhile upgrade for a light duty Ryobi.
FAQ
Which chuck fits a Ryobi drill press? One matching your arbor’s Jacobs taper (often JT33) and, if you replace the arbor, the spindle’s Morse taper (often MT2). Confirm your model’s sizes before buying.
How do I remove a Ryobi drill press chuck? Unplug it, open the jaws, remove any internal retaining set screw, then drive the chuck off its taper with wedges tapped evenly from both sides.
Does my Ryobi chuck have a set screw? Many small chucks use an internal set screw to retain the chuck on the arbor. Open the jaws and look down the bore. If present, remove it (it may be reverse threaded) before driving the chuck off.
Can I put a keyless chuck on a Ryobi? Yes, if it matches your arbor’s Jacobs taper. Keyless is a popular upgrade for the small bit work these presses handle best.
My Ryobi chuck will not grip small bits. Is it worn? First clear chips from the jaws and try a good key. If the jaws still will not close evenly, the chuck is worn and needs replacing.
Do I oil the taper on install? No. Tapers hold by dry friction, and oil can let a light spindle lose the chuck.
How true should it run after the swap? A few thousandths of runout is normal on a light duty press. A visible wobble means reseat the chuck.
References
- Zoro Resource Hub, Morse vs. Jacobs Tapers. https://www.zoro.com/resourcehub/what-are-the-dimensions-and-angles-of-morse-tapers-and-jacobs-tapers/
- Occupational Safety and Health Administration, Woodworking eTool: Drill Presses. https://www.osha.gov/etools/woodworking/production/machines-tools/drill-press


