
How to Install a Chuck on a Drill Press Without Losing Accuracy
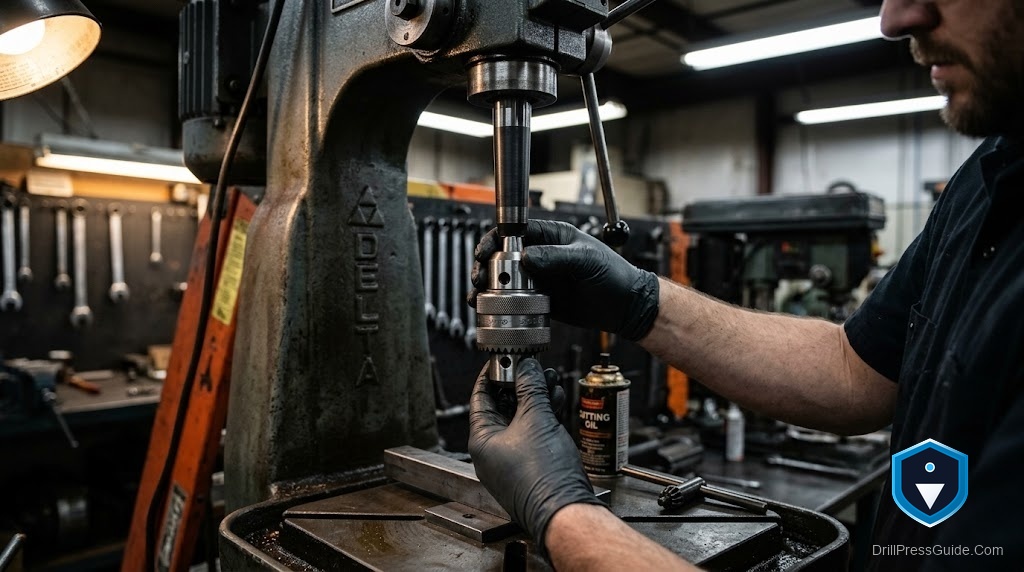
The new chuck arrives, you thread or tap it on in about thirty seconds, and then the first hole comes out with a visible wobble. That is the story of most bad chuck installs. The part goes on fast, and the accuracy leaks out somewhere you did not watch. Learning how to install a chuck on a drill press is less about muscle and more about clean surfaces, the right seating method, and one check at the end that most people skip.
Installing a chuck means seating the chuck onto the spindle so it runs true and holds torque. There are two common ways this connection is made: a taper (the chuck slides onto a matching arbor and holds by friction) and a threaded mount (the chuck screws onto the spindle nose). Which one you have decides every step that follows, so identify it before you touch anything.
The direct answer: clean the mating surfaces until they are dry and bright, seat a taper chuck with a single firm axial push (never a hammer swing to the side), or hand thread a threaded chuck fully home, then confirm runout with an indicator before you trust it. Skip the cleaning and you trap grit that throws the whole thing off center.
First, know what you are mounting to
- Tapered mount. The chuck has a tapered bore (a Jacobs taper, such as JT33) that mates to an arbor. The arbor’s other end is often a Morse taper (MT2 is common on home drill presses) that sits in the spindle. Tapers hold by friction alone, so cleanliness is everything.1
- Threaded mount. The chuck screws directly onto a threaded spindle nose. Less common on woodworking presses, more common on some import machines.
If you are not sure, look at the back of the chuck. A smooth tapered hole means taper mount. Internal threads mean threaded mount.
Installing a taper mount chuck
- Clean both tapers. Wipe the arbor’s Jacobs taper and the chuck’s bore with a clean, dry rag. No oil, no grease. A tapered friction fit needs bare metal on bare metal. A fingerprint of oil can let the chuck spin or drop later.
- Open the jaws fully. Retract the jaws inside the chuck so nothing gets damaged during seating.
- Seat with an axial push. Line up the chuck square on the arbor and push straight on with firm hand pressure. To fully seat it, stand a scrap of hardwood under the chuck and lower the quill so the chuck presses down onto the block, or tap the block, not the chuck, with a non marring mallet. The force must run straight up the axis, not sideways.
- Do not hammer the side of the chuck. A side blow is the fastest way to knock the whole assembly off true.
Installing a threaded chuck
- Clean the spindle threads and the chuck threads.
- Thread the chuck on by hand until it stops.
- Snug it the last bit by closing the jaws on a hex key and giving a short, controlled turn, or per the chuck maker’s instruction. Do not gorilla it.
The check nobody wants to do
Here is where a careful install separates from a hopeful one. Chuck a straight, known good rod or a precision dowel pin, then run a dial indicator against it while you turn the spindle by hand. A few thousandths of runout is normal on a home machine. A visible wobble means the taper did not seat clean, so pull it, reclean, and reseat. This one minute saves you from blaming the drill press for holes the chuck caused.
If you do not own an indicator yet, it is the single most useful accuracy tool on the bench, and a simple one paired with a magnetic base pays for itself the first time it catches a bad seat.
Tools worth having on hand
- A non marring dead blow or soft mallet for seating without denting.
- A JT33 to MT2 chuck arbor if you are replacing the arbor along with the chuck.
- A straight test pin or rod for the runout check.
Where people go wrong
The most common mistake is speed. A taper chuck feels installed the moment it stops sliding, but “stopped sliding” and “fully seated” are not the same. The second mistake is oil, applied out of habit from every other mechanical job, which is exactly wrong for a friction taper. The third is skipping the runout check and spending the next month fighting oval holes.
The verdict
A chuck install is a two minute job that rewards patience and punishes shortcuts. Clean the tapers dry, seat straight along the axis, and verify runout before you cut anything that matters. If your holes still wander after a clean seat, the problem has moved upstream to the arbor or the spindle bearings, not the chuck.
Carry these three with you:
- Bare, dry metal on any tapered fit. Oil is for other jobs.
- Push and seat along the axis, never sideways.
- Indicate the runout once, and trust the tool after that.
FAQ
How do I install a chuck on a drill press? Identify whether it is a taper or threaded mount. Clean the mating surfaces dry, seat a taper chuck with a straight axial push (using a wood block and the quill or a soft mallet), or hand thread a threaded chuck fully home. Then check runout with an indicator.
Should I oil the taper before installing the chuck? No. A Jacobs or Morse taper holds by dry friction. Oil can let it slip or drop. Wipe both surfaces clean and dry.
Can I hammer a chuck onto the arbor? Only along the axis, and only through a wood block with a soft mallet. Never strike the side of the chuck, which knocks it out of true.
How do I know if my chuck is a taper or threaded fit? Look at the back of the chuck. A smooth tapered bore is a taper mount. Internal threads mean it screws onto the spindle nose.
What is acceptable runout after installing a chuck? A few thousandths of an inch is normal on a home drill press. A wobble you can see by eye means reseat the chuck.
My chuck keeps falling off. What went wrong? Usually oil or grit on the taper, or a chuck that was never fully seated. Clean both tapers dry and reseat with firm axial pressure.
Do I need a new arbor when I replace the chuck? Not always. If the arbor’s taper is undamaged you can reuse it. If it is scored or worn, replace it so the new chuck seats true.
References
- Zoro Resource Hub, Morse vs. Jacobs Tapers: Dimensions, Angles and Sizing. https://www.zoro.com/resourcehub/what-are-the-dimensions-and-angles-of-morse-tapers-and-jacobs-tapers/
Footnotes
-
Zoro, Morse vs. Jacobs Tapers. ↩


