
How to Remove Chuck from Old Drill Press Without Losing Accuracy
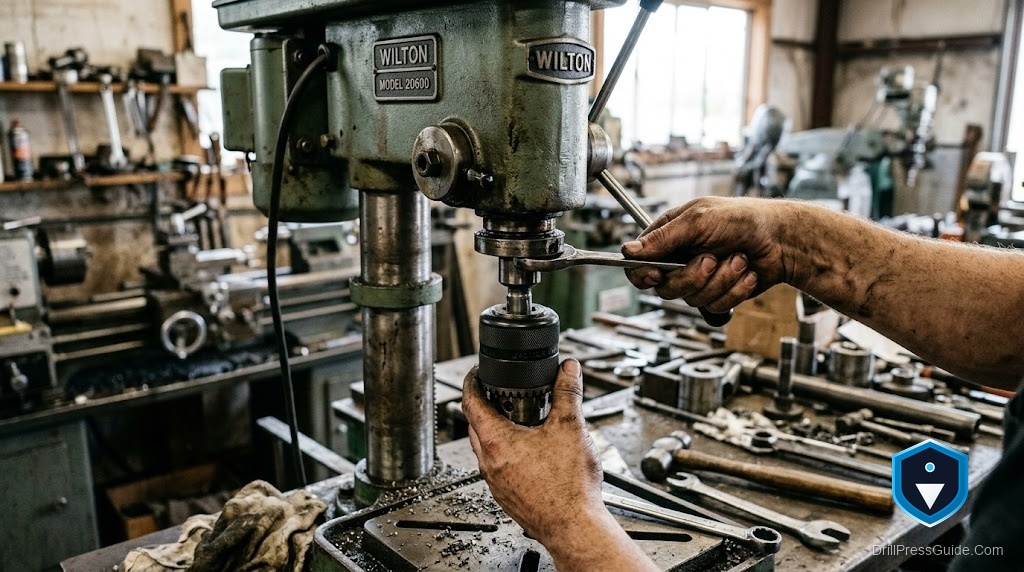
Somewhere in the middle of most drill press restorations comes the moment when the old chuck has to come off. Maybe it is sprung and drilling off center, maybe you just want to clean the taper underneath, or maybe you are converting to a better chuck. On an old machine that has been together for fifty years, this is where people get into trouble, prying, hammering in the wrong place, and putting a wobble into a spindle that used to run true. Removing a chuck from an old drill press is genuinely easy, but only if you understand how it is held on and respect the two things that matter: the taper and the spindle bearings.
Almost every drill press chuck is not threaded on. It is pressed onto a tapered arbor, most often a Jacobs taper such as JT33, and that arbor is in turn pressed or tapered into the spindle. The friction of the taper is all that holds it, which means removal is about breaking that friction cleanly, straight along the axis, without hammering sideways on the spindle. Get the direction of force right and the chuck pops off in seconds. Get it wrong and you can brinell the spindle bearings.
First, understand your setup
Before touching anything, work out how your chuck is mounted, because it changes the method. On most old presses the chuck sits on a JT-taper arbor, and that arbor either seats in a Morse taper in the spindle or is integral with the spindle nose. Check for a threaded collar or a set screw first, since a few chucks are secured that way and no amount of tapping will free a chuck that is still bolted on. If there is a small slot or a pair of flats near the top of the arbor, that is where a wedge or a special key goes.
Retract the quill and lock it if your press allows, so the spindle cannot move while you work. This protects the bearings from taking the shock.
The clean ways to remove it
There are three tidy methods, in order of preference.
Wedges. If your arbor exits into a slot in the quill or has a gap behind the chuck, a pair of tapered drift keys or chuck wedges driven evenly from both sides pushes the chuck straight off the taper. Even pressure from both sides keeps the force axial, which is what protects accuracy.
A chuck removal key. Some presses are designed with a slot for a wedge-shaped chuck key that does the same job in one motion. If yours has the slot, this is the intended method and the safest.
A clamshell or bearing puller. When there is no slot and the chuck is on a stub arbor, a small gear or bearing puller gripping behind the chuck body draws it off cleanly. Snug the puller, take up tension, and let the puller do the work rather than shocking it.
Whatever the method, the golden rule is to pull or push along the axis, never to hammer sideways on the chuck or spindle. Sideways blows are exactly what knock a true-running spindle out of alignment.
What not to do
Do not pry the chuck jaws against the table to force it off; that bends the quill and springs the jaws. Do not hammer the side of the chuck. Do not heat it aggressively near the bearings. And do not skip checking for a set screw, since fighting a chuck that is still fastened is how good spindles get ruined. The Jacobs chuck maker’s own guidance on mounting and removing chucks is worth reading if you are unsure, because it lays out the proper wedge and puller technique.
Seating the new chuck
Once the old chuck is off, clean both the arbor taper and the spindle bore until they are bright and dry, with no oil, since a taper grips by friction and oil lets it slip and spin. Retract the new chuck’s jaws fully so nothing protrudes, line the chuck up on the arbor, and seat it with a single firm axial push or one clean tap on the end using a soft face, driving straight along the axis. A standard JT33 keyed chuck seats this way in one motion, and a larger replacement JT33 chuck mounts identically if you are upgrading capacity. Check runout with an indicator afterward; budget chucks can carry a few thousandths, so verify before trusting precision work.
Conclusion
Removing a chuck from an old drill press without losing accuracy comes down to understanding that the chuck is held by a taper, not threads, and to keeping every force along the spindle axis. Check for a set screw, lock the quill, then use wedges, a chuck key, or a puller to break the taper cleanly. Never hammer sideways or pry against the table. Clean the taper bright and dry before seating a new chuck with a single axial push, and check runout. Done this way, the spindle runs as true afterward as it did before.
Three takeaways: the chuck is held by a friction taper, keep all force along the axis, and seat the new chuck on a bright, dry, oil-free taper.
Frequently Asked Questions
How is a drill press chuck attached? Most are pressed onto a tapered arbor, commonly a Jacobs taper like JT33, held only by friction. A few use a threaded collar or set screw, so always check before trying to tap one off.
How do I get a stuck chuck off an old drill press? Check for a set screw first, then use tapered wedges or a chuck key in the arbor slot, or a bearing puller behind the chuck. Apply force straight along the axis, never sideways.
Will removing the chuck hurt the spindle bearings? Only if you hammer sideways or shock the spindle. Lock the quill and keep all force axial with wedges or a puller, and the bearings are unaffected.
Why should I not pry the chuck against the table? Prying bends the quill and springs the chuck jaws, ruining accuracy. Removal force must run along the spindle axis, not against the side.
How do I put the new chuck on? Clean the arbor and bore bright and dry, retract the jaws, line it up, and seat it with one firm axial push or a single soft-face tap. Then check runout with an indicator.
Why must the taper be free of oil? A taper grips by friction. Oil or grease lets the chuck slip and spin on the arbor under load, so both surfaces must be clean and dry before seating.
References
- Jacobs Chuck Manufacturing, Mounting and Removing Chucks. http://www.jacobschuck.com/uploads/ueditor/file/20200604/1591240204146153.pdf
- VintageMachinery.org, manufacturer histories and publication archive. http://vintagemachinery.org


