
Drill Press Sanding Attachment: Compatibility and Setup Guide
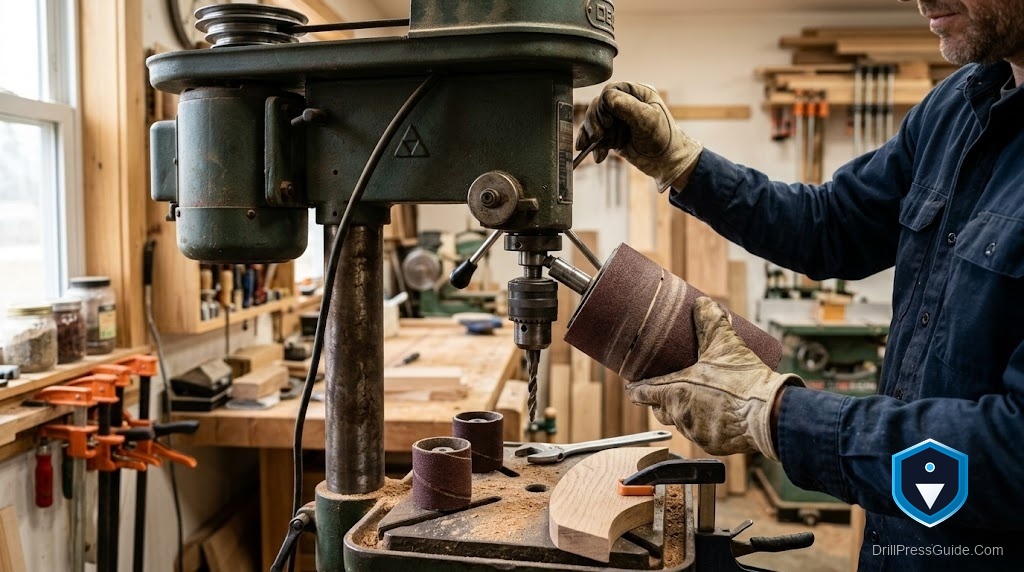
You already own a drill press. At some point you look at it and think: could this thing sand? The answer is yes - and it can do it surprisingly well, as long as you pair the right attachment to the right machine and set it up properly.
This guide covers every major category of drill press sanding attachment, how to mount each one without drama, and which drill press speed ranges actually matter for each type. By the end you will know exactly what to buy and what to expect.
Why Use a Drill Press for Sanding?
A drill press gives you something a handheld drill never can: a consistent, perpendicular relationship between the tool and the work table. That matters when you are smoothing the inside of a drilled hole, cleaning up a curved cut, or sanding an edge square to a face.
The downside? Your drill press was designed to push a bit down through material, not to absorb lateral pressure from a sanding drum. Use light passes, let the abrasive do the work, and your machine will handle it fine.
Types of Drill Press Sanding Attachments
Drum Sanders (Spindle Sanding Kits)
The most popular and most versatile option. A rubber drum expands slightly when a bolt is tightened on the bottom, gripping the sanding sleeve from the inside. The drum mounts in your keyed chuck by a 1/4-inch shank (or 1/8-inch for smaller drums).
What they are great for:
- Smoothing the inside of curved cuts (like bandsaw curves)
- Cleaning up drilled holes up to 2 inches deep
- Rounding and refining contoured edges
Three kits worth owning:
LINE10 Tools 16pk Sanding Drum and Sleeves Set - Four drum sizes (1/2”, 3/4”, 1”, 1-1/2”) with a 1/4-inch shank and 2-inch-long sanding surface. That extra length means you can sand deeper into curved stock without repositioning. The zirconia sleeves last longer than aluminum oxide on hardwood.
WEN DS164 20-Piece Sanding Drum Kit - WEN packages four drum sizes with 16 sanding sleeves (two 80-grit and two 120-grit per size). The 1/8-inch shank on the smallest drum gives you reach into tight places a 1/4-inch shank cannot enter. A compact, solid starter kit.
POWERTEC 71634 20-Piece Drill Press Sanding Drum Kit - POWERTEC goes to 2-1/2 inches of sanding length, making it the deepest reach of the three. If you regularly sand the insides of bowls, boxes, or thick curved parts, that extra half-inch of drum matters.
Verdict on drums: The LINE10 kit is the best all-around choice for most woodworkers. The POWERTEC kit wins if you need extra depth. The WEN kit is the most compact and plays nicely with WEN drill presses.
Flap Sander Attachments (Sanding Mops)
A flap sander - also called a sanding mop - uses overlapping cloth-backed abrasive flaps arranged around a central hub. As the hub spins, the flaps fan out and conform to whatever surface they contact.
This is the right tool for:
- Moldings and raised panel profiles
- Carved surfaces and CNC-cut textures
- Finishing contoured faces where a drum would leave flat spots
LINE10 Tools 4-inch Sanding Mop Kit - Three mops in 80, 120, and 240 grit on a 1/4-inch shank. The cloth-backed flaps are notably more flexible than paper-backed versions, which means they hug complex profiles instead of skipping over them. Run these at 600-1200 RPM for the cleanest finish.
One honest flaw: Flap sanders are aggressive on endgrain. Keep your passes light and do not linger on any one spot or you will burn the wood.
Disc Sanding Arbors
A disc sanding arbor mounts a standard PSA (peel-and-stick) or hook-and-loop sanding disc in your chuck. These are less common in drill press work because the angle is not ideal - a drill press spins a disc parallel to the table, which limits what surfaces you can reach. They work best for cleaning up the faces of small, flat workpieces held below the spinning disc.
Compatibility Check: Variable Speed Matters
Most drill presses do not run slow enough for large-diameter sanding drums on their factory settings.
| Attachment Type | Target Speed Range |
|---|---|
| Small drum (1/2”) | 1,200 - 3,000 RPM |
| Medium drum (3/4” - 1”) | 700 - 1,500 RPM |
| Large drum (1-1/2” - 2”) | 400 - 1,000 RPM |
| Flap sander (4”) | 600 - 1,200 RPM |
The goal is surface speed at the outer edge of the drum, not raw RPM. A 2-inch drum at 1,500 RPM is moving too fast - you will burn the wood and glaze the sleeve. If your drill press does not have variable speed and tops out at 3,000 RPM with no low-speed setting, stick to the 1/2-inch drums only.
Drill presses with digital speed readouts make this much easier to manage - you can dial in the exact speed for each drum diameter without guesswork.
Setup Guide
Step 1: Choose and Chuck Your Drum
Insert the shank into your keyed chuck. Tighten the chuck key firmly at all three chuck openings - a loose drum will wobble and leave uneven marks on your work. Confirm the drum runs true (no wobble) before you touch it to wood.
Step 2: Set the Depth Stop
Use the depth stop on your quill to limit spindle travel. For drum sanding, you typically want 1/2 inch to 1 inch of quill movement - enough to let you work the drum against the workpiece but not so much that the drum contacts the work table.
Step 3: The MDF Table Insert Technique
This is the most underrated setup tip for drill press sanding. Cut a piece of 3/4-inch MDF to fit your work table, then drill a hole through it just slightly larger than your sanding drum. Lower the drum into the hole so the bottom of the drum is flush with (or slightly below) the MDF surface.
Why this works: the drum is now supported on all sides at the base. You can press curved parts against it without them diving under the drum. This setup turns your drill press into a functional benchtop spindle sander.
Step 4: Confirm Quill and Spindle Centerline
Make sure your work table is perpendicular to the spindle centerline before you start. Use a small square against the column to check the table angle. A tilted table is the most common cause of tapered sanding marks on parts that should be flat.
Step 5: Speed and Feed
Start slow. Feed the workpiece into the drum from the outside edge of the sleeve, not the bottom. Keep the workpiece moving - holding it still on a spinning drum burns the wood and glazes the abrasive. Light, consistent pressure is the key.
Comparison Table
| Product | Pieces | Drum Sizes | Max Length | Shank | Best For |
|---|---|---|---|---|---|
| LINE10 16pk | 16 | 1/2”, 3/4”, 1”, 1-1/2” | 2 inches | 1/4” | All-around use |
| WEN DS164 | 20 | 1/2”, 3/4”, 1”, 1-1/2” | 1-1/2 inches | 1/4” and 1/8” | WEN presses, tight spaces |
| POWERTEC 71634 | 20 | 1/2”, 3/4”, 1”, 1-1/2” | 2-1/2 inches | 1/4” and 1/8” | Deep sanding tasks |
| LINE10 Mop Kit | 3 | 4-inch flap | N/A | 1/4” | Profiles, moldings |
FAQ
Can I use a sanding drum on any drill press? You can use small drums (1/2” to 3/4”) on almost any drill press. For larger drums, you need a machine that can run at 1,000 RPM or lower. Check your drill press’s speed range before buying a large-diameter kit.
Does my drill press need variable speed for drum sanding? Not strictly, but it helps enormously. If your machine has a fixed high speed, stick to smaller drums. Variable speed or a step-pulley system with multiple low settings opens up all drum sizes.
What grit should I start with? Start with 80-grit to remove material and shape curves, then finish with 120-grit for a smooth surface. 240-grit on the flap mop will leave a surface ready for finish.
Why does my sanding sleeve burn the wood? Two reasons: speed too high, or feed too slow. Increase your workpiece movement and lower your drill press speed. Also check that your sleeve is not loaded with debris - a clogged sleeve generates heat instead of cutting.
Will drum sanding wear out my drill press bearings? Light sanding loads will not damage a quality drill press. The lateral force from a drum is low compared to drilling forces. Just avoid pressing so hard that the drum stops spinning.
References
- LINE10 Tools product listings, amazon.com
- WEN Products DS164 specification, wenproducts.com
- POWERTEC 71634 product page, amazon.com


