
How to Remove the Arbor from a Shop Fox Drill Press: Fit, Tools, and Final Checks
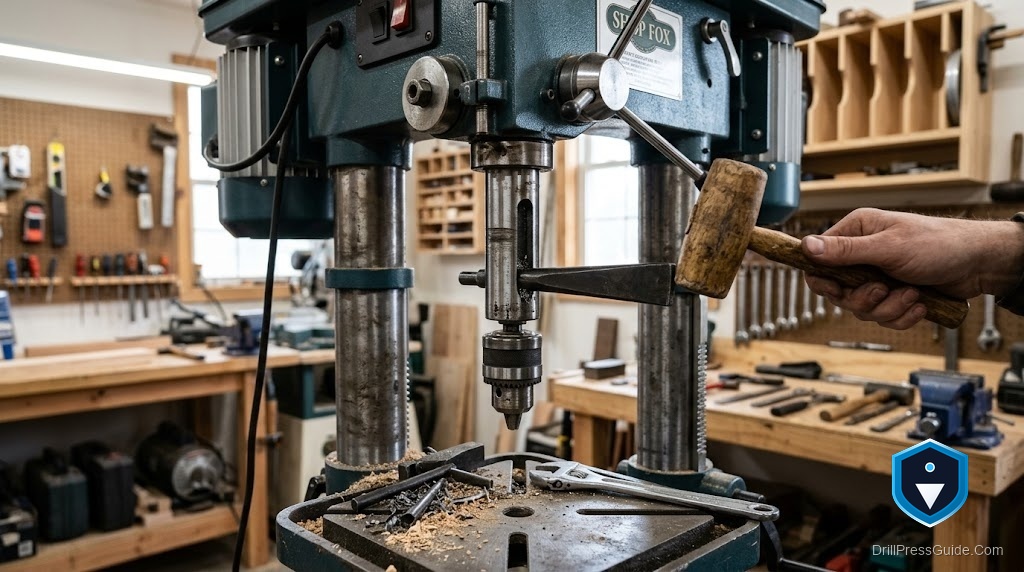
You clamp a fresh dial indicator against the spindle, spin it by hand, and watch the needle swing more than you like. So you decide to pull the chuck and inspect the taper, and that is where most people learning how to remove the arbor from a Shop Fox drill press hit a wall. They go looking for a slot to drive a drift through, and there isn’t one.
Here is the part nobody tells you up front. On the popular Shop Fox W1668 benchtop machine, the chuck does not sit on a separate slide-out arbor the way it does on a lot of big floor presses. The JT33 taper is cut right into the spindle nose. Shop Fox’s own parts breakdown lists that piece as the spindle made for a JT33 chuck, not as a removable arbor. So “removing the arbor” on this machine really means popping the chuck off that fixed taper, then deciding whether the spindle itself needs to come out.
What “arbor” actually means on this machine
A drill-press arbor is the connector between the spindle and the chuck. On many presses it is a two-taper part: a Morse taper on top that slides up into the quill, and a Jacobs taper on the bottom that the chuck grips. Drive out the Morse taper with a drift and the whole arbor drops free with the chuck still attached.
The W1668 skips that middle part. The Jacobs taper (JT33) is machined onto the end of the spindle. There is no Morse taper socket in the quill and no drift slot to aim a wedge through. That single design choice changes every step below, so confirm it on your machine before you buy a tool that will not fit.
If you own a bigger Shop Fox, do not assume it matches. Benchtop and floor models can use different tapers, and a number like a W1668 will not always behave like a floor unit. Check the spindle section of your manual and your model number first.
The short answer
Unplug the press. Lower the quill and lock it so nothing moves. Because the taper is integral on the W1668, you do not drift out an arbor. Instead you slip a pair of JT33 chuck-removal wedges into the gap between the back of the chuck and the spindle shoulder, then squeeze or tap them together until the chuck breaks free of the Jacobs taper. If your Shop Fox is a model that does use a removable Morse-taper arbor with a drift slot, you drive a taper drift through that slot instead. Same goal, two different mechanics.
Confirm your setup before you touch a tool
Open the jaws all the way and look down inside the chuck. If you see a screw head or an Allen socket at the bottom, you have a threaded or bolt-retained chuck, and that fastener comes out first (many are left-hand thread, so turn clockwise to loosen). No screw means a straight taper fit that pulls with wedges or a drift.
Now check the spindle nose. If the chuck seats onto a taper that is clearly part of the spindle, you are in W1668 territory: wedges only. If there is a visible parting line and an elongated hole (the spindle access window, or drift slot) through the quill above the chuck, you have a removable arbor and a drift will work.
Grab a flashlight for this. Guessing here is how people crack a chuck body or bruise a spindle.
Tools that actually fit
For the W1668 and its integral JT33 nose, the right tool is a JT33 chuck-removal wedge set, not a drift. A solid, correctly sized pair like this JT6 and JT33 drill chuck removal wedge set slides into the shoulder gap and pushes the chuck straight off the taper. One honest flaw to plan around: these wedges are thick, and they need roughly a half inch of open gap between the chuck and the shoulder to seat. On a snug factory fit you may need to tap the chuck jaws down first or start the wedges at their thinnest edge.
If your machine uses a Morse-taper arbor with a drift slot, you want a taper drift (drift key) sized to that Morse taper, a dead-blow or non-marring mallet, and a block of wood to catch the falling chuck. Do not reach for a screwdriver as a drift. The flat tip chews the slot and mushrooms fast.
Step by step: pulling the chuck off the integral taper
-
Unplug the drill press. This machine will not start with the belt cover open, but pull the plug anyway. You will have your hands near the spindle.
-
Lower the quill using the feed handle and lock the quill so it cannot creep up while you work. A locked quill gives the wedges something firm to push against.
-
Lay a folded towel or a block of wood on the table directly under the chuck. A freed chuck drops with real weight and will ding a cast table.
-
Seat the wedges. Slide the two wedges into the gap between the back face of the chuck and the spindle shoulder, one on each side so the force stays balanced. Push them in by hand until they grip.
-
Draw them together. Squeeze the wedges toward each other, or give them light alternating taps with the mallet. The taper will let go with a crack. Keep it even, side to side, so the chuck comes off square.
-
Catch and inspect. With the chuck off, wipe the JT33 taper on the spindle clean and dry. Look for burrs, rust freckles, or a bright rubbed ring that signals the chuck was spinning on the taper. That kind of wear is often what sends people down this path in the first place.
When the spindle itself has to come out
Sometimes the taper is fine but the spindle is worn or bent, and the whole spindle needs to come out through the quill. This is a bigger maintenance job than a chuck swap, and it means getting into the quill assembly, not just the nose. Shop Fox sells the JT33 spindle and the matching quill parts individually, so a tired spindle is a replaceable item rather than a reason to scrap the press. If you are only chasing runout, though, swap the chuck first and measure again before you tear into the quill.
Shop Fox against the usual rivals here
People cross-shop the W1668 against Grizzly and JET, and on this specific task the differences matter. Grizzly and Shop Fox share a parent company, so their parts support, manuals, and taper conventions feel almost identical, which makes finding a matching chuck or spindle easy. JET leans more toward Morse-taper arbors with proper drift slots on its floor presses, so on many JET machines you get to use a clean drift-and-tap removal that the benchtop Shop Fox simply does not offer. Neither approach is wrong. The W1668 trades the convenience of a drift slot for a compact head and its oscillating spindle-sanding trick.
Final checks before you call it done
Reinstall by wiping both tapers bone dry, seating the chuck by hand, then setting it with one firm tap using a wood block against the closed jaws. Never seat it by running the motor into the table.
Spin the spindle by hand and put the indicator back on. If the runout dropped, the old chuck or a dirty taper was your problem. If it did not, the spindle or quill bearings are the next suspects.
Conclusion
Removing the “arbor” on a Shop Fox W1668 is really a chuck-off-the-spindle job, and once you know the taper is integral, the whole thing gets simple and low risk.
- The W1668 spindle nose is a fixed JT33 taper, so use wedges, not a drift.
- Confirm whether your model has a drift slot before buying any removal tool.
- Keep force even side to side and always support the chuck as it drops.
- If clean tapers do not fix runout, look at the spindle and quill bearings next.
FAQ
Does the Shop Fox W1668 have a removable arbor? Not in the usual sense. The JT33 Jacobs taper is machined into the spindle nose, and the parts list shows a spindle built for a JT33 chuck rather than a separate slide-out arbor. You remove the chuck from the taper, and if needed you replace the spindle itself.
Why can’t I find a drift slot on my Shop Fox drill press? Because the benchtop W1668 does not use a Morse-taper arbor in the quill, so there is nothing for a drift to push against. Drift slots show up on presses that carry a removable Morse-taper arbor, which includes many floor machines but not this benchtop.
What size wedges do I need? JT33 wedges match the Jacobs taper on this machine. A JT6 and JT33 set covers it. Measure the gap between the chuck and the spindle shoulder first, since thick wedges need roughly a half inch of clearance to seat.
Can I use a hammer and screwdriver instead of wedges? You can try, but you will likely mar the chuck and the spindle shoulder, and you rarely get even pressure. Proper wedges push both sides at once and leave the taper undamaged.
The chuck will not budge. What now? Add a little penetrating oil at the seam, let it sit, and try again with even taps. For a truly seized fit, the traditional last resort is opening the jaws, drilling carefully through the back of the chuck body, and pressing the taper out, which sacrifices the chuck but frees the spindle.
Will removing the chuck affect the oscillating sander function? No. The oscillating spindle motion comes from the quill mechanism and a separate belt setup, not the chuck. You can remove and reinstall the chuck without touching the sanding conversion.
Do I need to remove the chuck to change speeds? No. Speed changes on the W1668 happen at the belt and pulleys under the cover. Unplug the press, open the cover, and move the belt per the chart. The chuck stays put.
References
- Shop Fox W1668 Owner’s Manual, Woodstock International / Grizzly Industrial: https://cdn0.grizzly.com/manuals/w1668_m.pdf
- Shop Fox W1668 Parts List, Grizzly Industrial: https://cdn0.grizzly.com/partslists/w1668_pl.pdf
- Shop Fox W1668 Specification Sheet, Grizzly Industrial: https://cdn0.grizzly.com/specsheets/w1668_ds.pdf
- Jacobs Chuck Manufacturing, Mounting and Removing Chucks: http://www.jacobschuck.com/uploads/ueditor/file/20200604/1591240204146153.pdf


