
Drill Press Table Lift Parts: What to Measure Before You Order
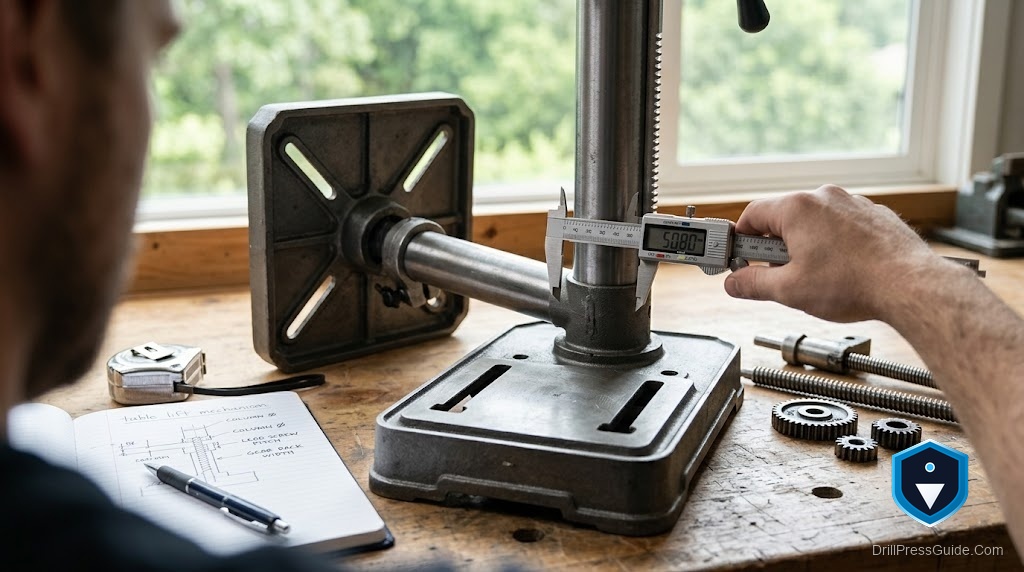
The table lift is the mechanism that raises, lowers, and locks the table on the column, and when a part of it wears or breaks, drilling turns into a wrestling match. The table sags under its own weight, the crank slips, or the lock will not hold. Ordering the right replacement part sounds simple until you realize table lifts are not standardized, and the piece that fits one press will not fit another. Measuring first saves you from a drawer full of wrong parts.
The table lift is the rack, pinion, crank, and lock collar that let you move the table up and down the column and clamp it in place. Its parts, the rack teeth, the worm gear, the crank handle, the lock lever, the collar, all have to match the column diameter and the original geometry. Getting the measurements right is the whole job of ordering a replacement.
Short answer: before ordering table lift parts, measure your column diameter, identify the exact worn part, and match it to your press’s make and model, because lift components are machine-specific. A rack cut for one column diameter simply will not mesh on another.
Why table lift parts are not universal
A table lift works by a pinion gear turning against a rack, with a collar clamping the assembly to the column. All three are sized to a specific column diameter and tooth pitch. Swap in a part cut for a different machine and the gear will not mesh or the collar will not clamp.
That is why “drill press table lift parts” is rarely a one-size purchase. The safest path is the original manufacturer’s part for your exact model, or a measured match to it.
The honest limitation: for older or discontinued presses, the exact part may no longer be sold. Then you are choosing between a salvaged part, a machined replacement, or, sometimes, accepting that the lift is beyond economical repair.
Measure and identify before ordering
- Column diameter. Caliper the column; the collar, rack, and pinion are all sized to it. This is the make-or-break number.
- The specific worn part. Identify exactly what failed, rack, pinion, crank, collar, or lock, so you order the right piece, not the whole assembly.
- Make and model. Match the part to your press’s model number, since lift geometry is machine-specific.
- Tooth pitch and length. For a rack, the tooth spacing and length must match the pinion and travel.
Repair versus workaround versus replacement table
Against replacing the lift part, a workaround like a support collar or a shop-made prop can hold a sagging table cheaply, but it is a patch, not a fix, and it does not restore smooth adjustment. Repair the lift if the part is available.
Against the whole problem, some owners give up on raising the original heavy table and instead add a lighter upgrade table on top, reducing what the lift must carry, using plans from IBUILDIT or Woodsmith or a ready-made top like the WEN 24-by-12-inch. That does not fix the lift but eases the load on it. You can look at general drill press replacement parts and a lighter drill press table with fence to reduce lift strain.
Setting up the repair
- Measure the column diameter and identify the exact failed part.
- Match it to your press’s make and model, or to the manufacturer’s parts list.
- With the power off, support the table so it cannot drop while you work.
- Replace the part, mesh the rack and pinion cleanly, and set the collar so the lift turns smoothly and locks firmly.
- Confirm the table holds position under load and stays square, and keep the area clear per CCOHS.
Who should read this
If your table sags, slips, or will not lock, the lift parts are the likely cause, and measuring your column is the first step. If your press is old and discontinued, weigh a machined or salvaged part against replacing the machine.
Bottom line
Drill press table lift parts are machine-specific, so measuring beats guessing every time. Caliper the column, identify exactly what failed, and match it to your model. If the exact part is gone, a workaround or a lighter upgrade table can buy time, but a true fix means the right part for your lift.
- Column diameter and model determine which lift parts fit.
- Identify the specific failed piece rather than ordering the whole assembly.
- Support the table before working, and confirm it locks and stays square after.
FAQ
Are drill press table lift parts universal? No. The rack, pinion, and collar are sized to a specific column diameter and model, so a part for one press rarely fits another.
What should I measure first? The column diameter. The collar, rack, and pinion all depend on it, so it is the make-or-break measurement.
My table keeps sagging. Which part is worn? Often the lock collar or the rack and pinion. Identify which one slips before ordering, and support the table meanwhile.
What if my press is discontinued? Look for a salvaged or machined replacement, or reduce the load with a lighter upgrade table. Sometimes the lift is beyond economical repair.
Can I just prop the table up? A support collar or prop is a temporary patch, not a fix. It holds the table but does not restore smooth adjustment.
How do I stop the table dropping during repair? Support it from below and switch off the press before removing any lift part, so it cannot fall.
References
- WEN 24 x 12-Inch Drill Press Table with Adjustable Fence and Stop Block: https://wenproducts.com/products/24-by-12-inch-drill-press-table-with-an-adjustable-fence-and-stop-block-t
- IBUILDIT Drill Press Table Plans: https://ibuildit.ca/plans/drill-press-table/
- Woodsmith Drill Press Table Plan: https://www.woodsmithplans.com/plan/pw-drill-press-table/


