
How to Square Up a Drill Press Table Without Losing Accuracy
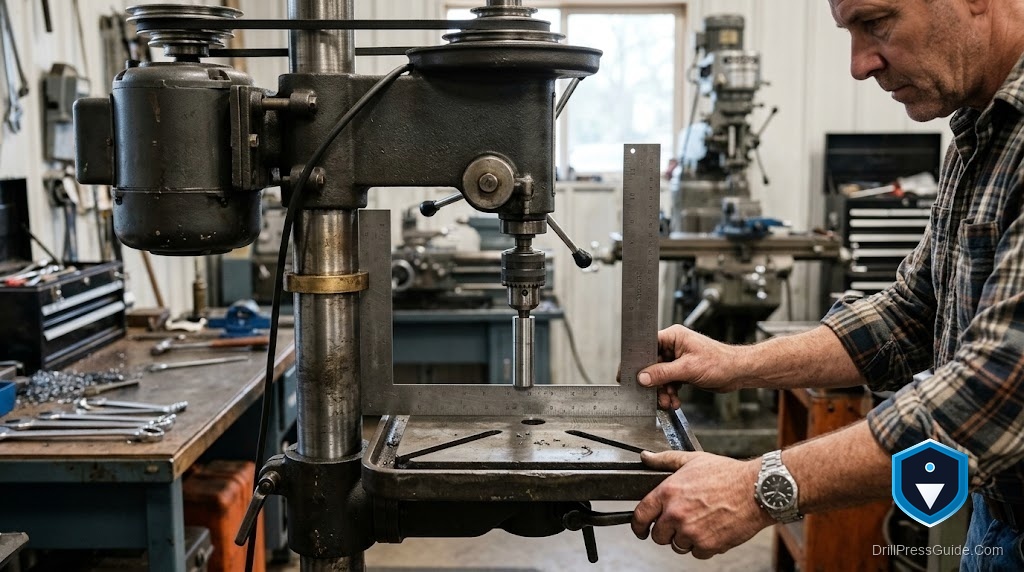
A drill press assumes something you rarely check: that the table sits exactly perpendicular to the bit. When it does not, every hole leans, and you usually discover it only after a dowel will not seat or a bolt goes in crooked. Squaring up the table is a ten-minute job that pays off on every hole afterward, and the method matters more than the tool you use to do it.
Squaring the table means setting the work surface truly perpendicular to the spindle centerline, so the bit enters the work at ninety degrees. The table pivots or bolts to the column, and small adjustments there swing the surface relative to the bit. Getting it perpendicular is the whole aim.
Short answer: chuck a straight rod, bend it into an L, and use it as a long pointer to compare the gap at the table on both sides of the hole. Adjust the table until the gap matches all around, and your table is square to the bit far more precisely than any small square can manage.
Why a small square is not enough
The instinct is to stand a machinist’s square against the bit and the table. It gets you close, but the bit is short and any tiny error is magnified over the length of a real drilling operation.
The rod trick beats it because it turns a small angular error into a large, visible gap. A long L-shaped rod in the chuck sweeps a wide arc, so even a fraction of a degree of tilt shows up as an obvious difference in the gap from one side to the other. You are measuring the same angle over a longer lever, which is why it is so much more sensitive.
The honest limitation: this squares the table to the spindle, not the spindle to the column. If your spindle itself is not true to the column, squaring the table is still correct for drilling, because what matters is the bit-to-table angle.
The rod method, step by step
- Switch off the press and remove any bit; clear the table of the vise and clutter.
- Chuck a straight steel rod, then bend the lower end into an L so it points sideways a few inches out.
- Rotate the chuck by hand so the pointer reaches the table on one side; note the gap between the rod tip and the table.
- Rotate the pointer 180 degrees to the other side and compare the gap.
- Loosen the table’s bevel adjustment and tilt it until the gap is equal on both sides.
- Recheck front-to-back as well as side-to-side, then lock the table.
If your table has a bevel scale, note that zero on the scale is a starting point, not the truth. Trust the equal-gap test over the printed mark.
Squaring the metal table versus using an auxiliary table
Against working straight off the cast metal table, adding a flat MDF auxiliary table gives you a sacrificial surface and room for a fence and stop block, but it only helps if it sits flat on a squared metal table beneath it. Square the metal first, then add the auxiliary top.
Many shop-made and commercial tables, like the WEN 24-by-12-inch table with an adjustable fence and stop block, or plans from IBUILDIT and Woodsmith, are built to bolt onto a squared table and add capacity. You can compare a ready-made drill press table with a fence, or a simple machinist square set for checking your work.
Setting it and keeping it
Once square, lock the bevel adjustment firmly so it does not drift, and recheck it after any time you tilt the table for an angled hole. A table you bevel and return to zero should always be re-tested with the rod, not trusted to the scale. Keep the area clear and wear eye protection when you resume drilling, per CCOHS.
Who needs to do this
If your holes come out slightly angled or your table has ever been tilted, square it now. If you just unboxed a new press, square it before the first real job, because factory zero marks are often a little off.
Bottom line
Squaring a drill press table is quick, and the bent-rod method makes it far more accurate than eyeballing a square against a short bit. Sweep the pointer side to side and front to back, equalize the gap, and lock it down. Every hole after that goes in straight.
- The bent-rod pointer magnifies tilt into a visible gap, beating a small square.
- Check both side-to-side and front-to-back, then lock the bevel.
- Trust the equal-gap test, not the printed bevel scale.
FAQ
How do I square a drill press table accurately? Chuck a straight rod, bend it into an L, and compare the gap to the table on both sides of the hole. Adjust until the gap is equal all around.
Why not just use a square? A square against a short bit magnifies small errors less than a long bent rod does. The rod sweeps a wide arc, so tilt shows up clearly.
Should I trust the bevel scale’s zero? Use it as a starting point only. Factory zero marks are often slightly off, so confirm with the rod test.
Do I square the table or the spindle? Square the table to the spindle. What matters for straight holes is the bit-to-table angle.
How often should I check it? Before the first job on a new press, and any time you have tilted the table for an angled hole.
Can I square an MDF auxiliary table? Square the metal table first, then set the flat MDF top on it. The auxiliary table is only as square as the surface under it.
References
- WEN 24 x 12-Inch Drill Press Table with Adjustable Fence and Stop Block: https://wenproducts.com/products/24-by-12-inch-drill-press-table-with-an-adjustable-fence-and-stop-block-t
- IBUILDIT Drill Press Table Plans: https://ibuildit.ca/plans/drill-press-table/
- Woodsmith Drill Press Table Plan: https://www.woodsmithplans.com/plan/pw-drill-press-table/


