
AR-15 Lower Jig for Drill Press: Setup and Safe Use
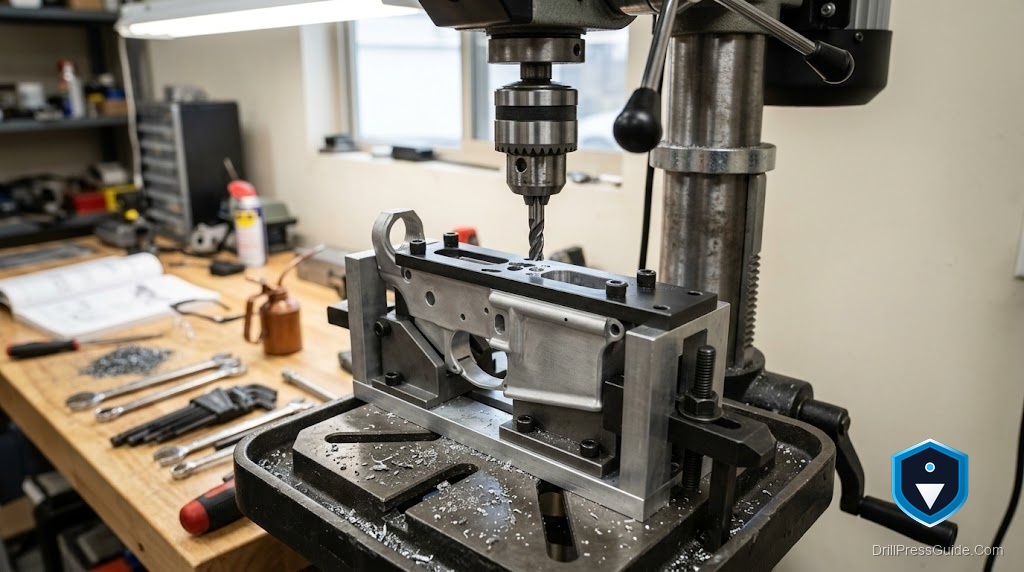
The first time a friend asked me to help finish an AR-15 lower receiver on a drill press, I felt that familiar mix of curiosity and caution. Building a firearm from an unfinished receiver is a legitimate and long-standing tradition for hobbyists in the United States, but it is also an area where the details matter enormously, both for your safety and your compliance with the law. A drill press and a good jig can do this work, but only if you approach it with the right knowledge and respect.
Before anything else, understand this: laws governing unfinished receivers and homemade firearms vary by country, state, and locality, and they have changed in recent years. It is entirely your responsibility to confirm that what you intend to do is legal where you live before you begin. This guide covers the tooling and technique, not legal advice, so please do your own due diligence with current regulations first.
Why a Drill Press and Jig Work Together
Finishing a lower receiver requires drilling several precise holes and milling out a cavity, all to tight tolerances. A jig is what makes this achievable without a full machine shop. It clamps around the receiver and provides hardened guides and templates that direct your bit to exactly the right spots at exactly the right depths. Without a jig, freehand accuracy at this scale is nearly impossible.
A drill press brings the controlled vertical plunge and depth stop that the drilling steps demand. A quality jig such as the WEN four inch drill press vise helps secure the jig assembly firmly to your table, because any movement during drilling ruins both the part and your safety margin. The vise is not the jig itself, but rock-solid workholding is half the battle in this work.
The Milling Problem You Must Understand
Here is where I have to be direct with you, because it matters more than anything else in this article. A drill press is engineered for axial loads, meaning force pushing straight down along the spindle axis. The fire control cavity in a lower receiver requires milling, which involves side loads, forces pushing the bit sideways.
Drill presses are not designed for side loads. Pushing an end mill sideways in a drill press can flex or damage the quill, wear out the bearings, and cause the bit to grab, snapping the tool or throwing the workpiece. If you choose to attempt milling steps on a drill press despite this, you must take extremely light passes, keep the workpiece clamped immovably, and understand you are working outside the machine’s intended design. A dedicated milling setup with proper end mills like a cobalt end mill set is the safer and more accurate choice for the cavity work.
Choosing Bits and Tooling
The drilling steps call for bits that match the jig’s specified diameters exactly, and quality matters here more than in general woodworking. The trigger and hammer pin holes, the selector holes, and the takedown pin holes each have a specified size, and using the correct, sharp bits prevents wandering and oversized holes. A quality cobalt drill bit set stands up to the aluminum alloy these receivers are made from far better than basic bits.
Speed matters too. Aluminum likes a moderate to higher spindle speed with a steady feed, and a little cutting fluid keeps the bit cool and the finish clean. Let each hole clear its chips rather than forcing the bit, and always use the depth stop so you never plunge past the jig’s intended depth. Dull bits and excessive speed are how you get galling and torn holes.
Clamping, Alignment, and Depth Control
Everything in this work comes back to rigidity and alignment. The jig must be clamped to your drill press table so it cannot shift, and the receiver must be locked in the jig with no play. Any movement, even slight, transfers directly into misaligned holes that can render the part useless or unsafe.
Take time to square the jig under the spindle before you cut anything. Lower the bit with the machine off to confirm it enters each guide cleanly, and set your depth stop for every operation. Patience during setup saves you from expensive mistakes, since a receiver ruined by a wandering hole cannot be undone. Measure twice, confirm alignment, then drill.
Safety Comes First, Always
This work throws sharp metal chips and demands full attention. Wear eye protection without exception, because drilling and any milling of aluminum sends swarf flying. Keep your hands well clear of the spinning bit, never wear gloves near a rotating spindle, and clear chips with a brush rather than your fingers.
Work slowly and deliberately, and never rush a step because you are eager to finish. The combination of a spinning bit, a hard workpiece, and side loads the machine was not built for is exactly the kind of situation where injuries happen. If a cut does not feel right, stop and reassess rather than pushing through. Your fingers and eyes are worth far more than any project.
Verdict
Finishing an AR-15 lower on a drill press is genuinely possible, and with a solid jig, sharp cobalt bits, and immovable clamping, the drilling steps are well within reach for a careful hobbyist. My honest guidance is to treat the milling of the fire control cavity as the machine’s weak point, take feather-light passes if you attempt it at all, and strongly consider dedicated milling tooling for that stage. Secure everything with a dependable WEN drill press vise, use a quality cobalt drill bit set, and never compromise on eye protection or clamping. Above all, confirm the legality of your project where you live before you start, because that responsibility rests entirely with you.
- A jig provides the hardened guides that make precise receiver drilling possible on a drill press.
- A drill press handles axial loads well but is not designed for the side loads that milling requires.
- Use correct, sharp cobalt bits at moderate speed with cutting fluid, and always set a depth stop.
- Confirm the legality of finishing a receiver where you live before beginning, as that duty is entirely yours.
FAQ
Is it legal to finish an AR-15 lower receiver at home? Laws on unfinished receivers and homemade firearms vary widely by country, state, and locality, and they have changed in recent years. In some places it is permitted for personal use and in others it is restricted or prohibited. You must confirm current regulations where you live before starting, since that responsibility is entirely yours.
Can a drill press really finish an AR-15 lower? A drill press handles the drilling steps well, since those are vertical, axial operations it is designed for. The fire control cavity, however, requires milling with side loads the machine was not built for. Many hobbyists do the drilling on a drill press and use dedicated milling tooling or extremely light passes for the cavity.
Why is milling on a drill press risky? A drill press spindle and quill are engineered for downward axial force, not sideways side loads. Milling pushes the bit sideways, which can flex the quill, damage bearings, and cause the bit to grab and snap or throw the workpiece. If attempted at all, it demands very light passes and immovable clamping.
What drill bits should I use for a lower receiver? Use sharp bits that exactly match the diameters specified by your jig, and cobalt bits are a strong choice because they handle aluminum alloy well. Correct sizing prevents wandering and oversized holes. Pair them with moderate speed, steady feed, and a little cutting fluid.
How important is clamping for this work? It is critical. The jig must be clamped to the table and the receiver locked in the jig with no play, because any movement transfers into misaligned holes that can ruin the part. Rock-solid workholding is genuinely half the battle in receiver work.
What speed should I run for drilling aluminum receivers? Aluminum generally likes a moderate to higher spindle speed with a steady feed and a little cutting fluid to keep the bit cool. Let each hole clear its chips instead of forcing the bit. Too much speed or a dull bit causes galling and torn holes.
What safety gear do I need? Eye protection is non-negotiable, since drilling and milling aluminum throw sharp swarf. Keep hands clear of the spinning bit, never wear gloves near the spindle, and clear chips with a brush. Work slowly and stop immediately if a cut does not feel right.
References
- Bureau of Alcohol, Tobacco, Firearms and Explosives (ATF) regulations on firearms and receivers
- Machinery’s Handbook, Industrial Press, on spindle loads and machining aluminum
- Manufacturer documentation for drill press vises and workholding
- Fine Woodworking and machining references on drill press safety
- Tooling manufacturer guidance on cobalt bits and cutting speeds for aluminum


