
Homemade Drill Press Stand: Layout, Hardware, and Setup Choices
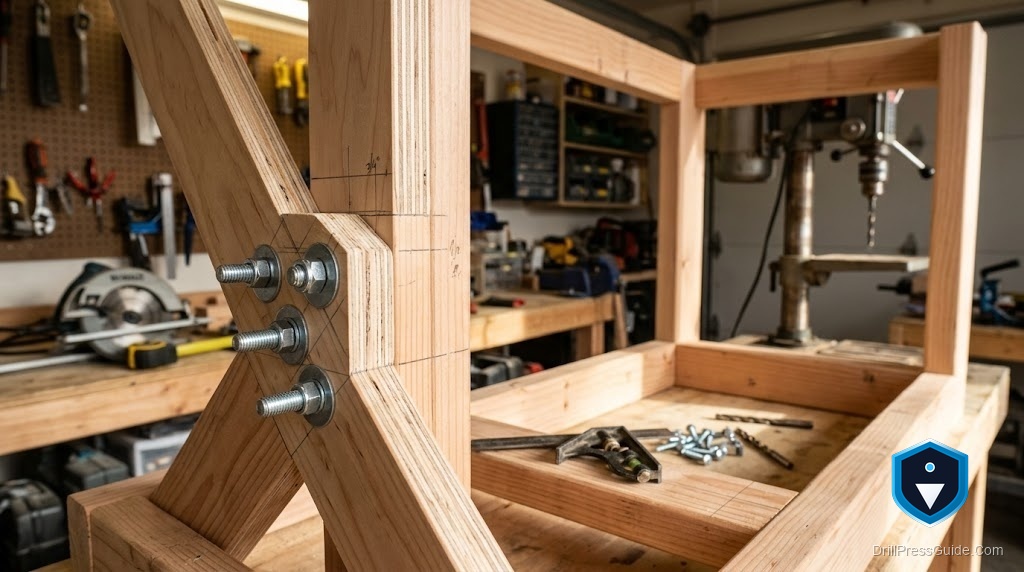
A benchtop drill press works better on a dedicated stand than crowded on a bench, and building your own lets you set the height, footprint, and features to suit exactly how you work. But a homemade stand only helps if it is rigid and stable, because the machine drills accurately only when its base does not flex, rack, or tip. Getting there is less about fancy joinery than about a handful of choices in layout, hardware, and setup. This guide walks through those choices so your stand steadies the machine instead of wobbling under it.
A homemade drill press stand is a shop-built floor stand that raises a benchtop drill press to a comfortable working height on a rigid, stable base. Building a good one comes down to layout, the height, footprint, and frame arrangement, hardware, the fasteners and mounting bolts that hold it together and hold the machine, and setup, how it is bolted down, leveled, and verified square.
Short answer: lay out a stand sized to your working height with a footprint wider than the machine and a braced frame, choose hardware that joins the frame solidly and bolts the machine down through its base holes, and set it up by leveling and verifying it is rock solid and square. Rigidity and stability are the goals, so every layout, hardware, and setup choice should serve them.
Layout: height, footprint, and a braced frame
Lay out the stand around three things. Set the height so the chuck and table sit at a comfortable working position for you standing, since the wrong height is a daily irritation. Make the footprint wider than the drill press base in both directions, because the machine is top-heavy and a narrow base invites tipping. And plan a braced frame, not a plain four-legged box, with diagonal braces or corner gussets and a lower shelf, so it resists racking and carries weight low. A layout that gets height, a wide footprint, and bracing right is what makes the finished stand comfortable and stable, so settle these before cutting, because no hardware fixes a poorly proportioned or unbraced design.
Hardware: joining the frame and holding the machine
Hardware choices decide whether the stand stays tight and holds the machine securely. Join the frame with glue and screws, or bolts, at every joint, since a stand held by a few nails works loose and wobbles, and add gusset plates or brackets at corners for extra rigidity if using metal. For mounting the machine, the key hardware is the bolts that fix the drill press to the top through its base holes, plus threaded inserts or captured nuts in the top if it is wood, so the machine is held square and immovable rather than by friction. If the stand will roll, choose locking casters rated for the weight that lock solid. Solid joining hardware and proper mounting bolts are what keep the stand rigid and the machine anchored.
Setup: mounting, leveling, and squaring
Setting the stand up correctly is what converts a good build into an accurate one. Bolt the drill press down through its base holes so it cannot shift, then stand the finished stand on the floor and level it, shimming the feet or adjusting levelers so it does not rock and the machine sits true. Lean on the machine hard to confirm the whole assembly is solid before trusting it. Square the table to the bit and drill a test hole to confirm the setup is accurate. If the stand rolls, lock the casters before drilling. These setup steps take minutes and are what ensure the stand actually steadies the machine, rather than looking right while flexing or rocking in use.
Verify and maintain
Finish by verifying and keeping it right over time. Confirm once more that the stand does not rock, the machine is bolted tight, and the table is square, then re-check these periodically, because wood moves, bolts settle, and casters and levelers can loosen with vibration. If you ever notice the machine wandering or chattering, check first for a loose bolt, a rocking foot, or a frame that has started to rack, since those are the usual culprits and are quick to fix. A homemade stand that is verified square and maintained tight keeps giving the drill press the steady, rigid base it needs, which is the entire reason to build one rather than leave the machine on the bench.
Conclusion
A homemade drill press stand is a rewarding, high-value build when you make the right choices in layout, hardware, and setup. Lay it out sized to your working height with a footprint wider than the top-heavy machine and a braced frame that resists racking; choose hardware that joins the frame solidly and bolts the machine down through its base holes; and set it up by leveling, squaring, and verifying it is rock solid, then maintain it as things settle. Keep rigidity and stability as the goal of every choice, and the stand does more than free your bench: it gives the drill press the steady, square base that accurate drilling depends on.
Frequently asked questions
What makes a good homemade drill press stand? Rigidity and stability: a height set to your stance, a footprint wider than the top-heavy machine, a braced frame that resists racking, solid joining hardware, and the machine bolted down square, then leveled and verified.
How tall should the stand be? Tall enough that the chuck and table sit at a comfortable working height for you standing. Set it from your own stance rather than a generic figure, since the wrong height is a daily annoyance.
How do I keep the stand from wobbling? Brace the frame with diagonals or corner gussets, join every joint with glue and screws or bolts rather than nails, keep the footprint wide and weight low, and level it so it does not rock.
How should the machine attach? Bolted through its base holes to the top, using threaded inserts or captured nuts in a wooden top, so it is held square and immovable. Friction alone lets it shift under load and drill inaccurately.
Can I put it on casters? Yes, if you use locking casters rated for the weight and lock them solid before drilling. An unlocked or underrated caster lets the stand move or sag, which spoils accuracy and is unsafe.
Why does the machine wander or chatter over time? Usually a loose mounting bolt, a rocking foot, or a frame that has started to rack as wood moves and bolts settle. Re-check level, tightness, and squareness periodically and fix these first.
References
- Forest Products Laboratory, wood construction references, fpl.fs.usda.gov
- OSHA, Machine Guarding eTool: Drill Presses, osha.gov


