How to Build a Drill Press Table and Fence Without Losing Accuracy
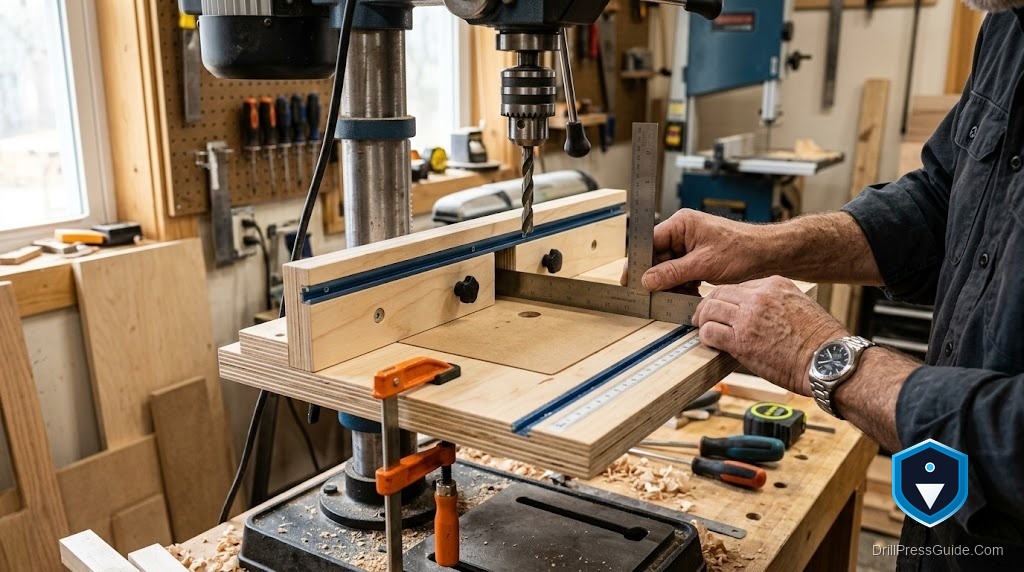
Building a table and fence for your drill press is one of those upgrades that seems simple until you notice the finished holes drifting or the fence flexing under a push. The build itself is straightforward; keeping it accurate is the real task. A table and fence exist to make holes land where you want them, repeatably and without tearout, and that only happens if the top stays flat, the fence stays straight and square, and the whole thing stays put. Here is how to build one without losing any of that.
Building a drill press table and fence means making a shop-built work surface with a straight, adjustable fence that mounts on the factory table, adding a larger flat area and a replaceable insert. Doing it without losing accuracy means a dead-flat top, a fence that is truly straight and locks square without flexing, solid mounting, an insert under the bit, and the whole thing squared to the spindle.
Short answer: build a flat laminated top, add a straight fence that rides in a track and locks square, mount it solidly to the factory table, fit a flush replaceable insert, and square everything to the spindle. Accuracy is lost through a warped top, a flexing or shifting fence, or a loose mount, so guard against those specific failures at each step of the build.
Keep the top flat
The top sets the table’s accuracy, so the first way to avoid losing accuracy is to build it dead flat. Laminate two layers of MDF or good plywood with glue, clamped flat across the whole panel, into a stiff top that resists warping, then trim it square to a size that supports your work without hitting the column. Store and use it so it stays flat, since MDF can sag if unsupported or humid. A top that starts flat and stays flat is the foundation, because no amount of care with the fence rescues a table whose surface has twisted or bowed under the workpiece.
Make the fence straight and non-flexing
The fence is where accuracy is most often lost, through flex or shifting, so build it to resist both. Use straight, stable, stiff stock, tall enough to support work on edge but braced or thick enough not to bow when you push work against it. Fit it in a T-track so it slides and locks firmly parallel and square to the spindle, and confirm it does not creep under load. Check it clears the chuck and column through the full spindle travel. A fence that stays straight and locks without flexing or shifting is what makes hole positions repeatable, so do not accept any spring or play here, since that is exactly what turns accurate positioning into drift.
Mount it so it cannot move
A table and fence that shift under drilling force lose accuracy no matter how well built, so mount the top solidly. Bolt through the factory table’s holes or slots into threaded inserts or captured nuts in the top, countersinking fasteners flush, never relying on friction or clamps alone. A solid mount keeps the whole assembly located and square while you drill and while you push work against the fence. This is the step most easily skimped and most quickly regretted, because a table that creeps mid-job undoes all the care taken with the top and fence, so make the mounting genuinely solid.
Fit the insert, then square and verify
Fit a snug, flush replaceable insert of the same material under the spindle, so it backs up the work against tearout and can be swapped when worn, keeping the surface flat at the bit. Then square the table to the spindle: check the surface is perpendicular to the bit with a reliable square, adjust or shim until true, confirm with a test hole in scrap, and square the fence too. Verify the assembly sits flat and does not rock. This final squaring is what actually delivers accuracy, so treat it as part of the build, not an optional extra, and re-check it occasionally as the wood settles.
Conclusion
Building a drill press table and fence without losing accuracy is about guarding against the specific failures that cost it: a warped top, a flexing or shifting fence, and a loose mount. Build a dead-flat laminated top and keep it flat, make the fence straight and stiff so it locks square without bowing or creeping, mount the top solidly so nothing moves under load, fit a flush replaceable insert, and square the whole thing to the spindle. Verify with a test hole and re-check over time. Address each failure at its step and the finished table and fence deliver positioned, repeatable, tearout-free holes, which is the entire reason to build them.
Frequently asked questions
How does a drill press table lose accuracy? Mainly through a warped top, a fence that flexes or shifts, or a loose mount that lets the table creep under drilling force. Guarding against those three failures keeps it accurate.
How do I keep the fence from flexing? Build it from straight, stiff stock, braced or thick enough not to bow when you push work against it, and lock it firmly in a track so it does not creep under load.
Why does the top have to stay flat? Because the top sets the table’s accuracy. A top that twists or bows under the workpiece throws off every hole, and no care with the fence can rescue a warped surface.
How do I mount it so it cannot move? Bolt through the factory table’s holes or slots into threaded inserts or captured nuts in the top, countersinking fasteners flush. Do not rely on friction or clamps alone.
What does the replaceable insert do for accuracy? It keeps the surface flat and supportive at the bit, backing up the work to prevent tearout, and can be swapped when it fills with holes so the drilling point stays clean.
Do I need to square it after building? Yes. Check the surface is perpendicular to the bit with a square, adjust or shim, confirm with a test hole, and square the fence. Squaring is what actually delivers the accuracy.
References
- Forest Products Laboratory, wood machining and construction references, fpl.fs.usda.gov
- OSHA, Machine Guarding eTool: Drill Presses, osha.gov