
Free Drill Press Table Plans: What the Drawings Should Include
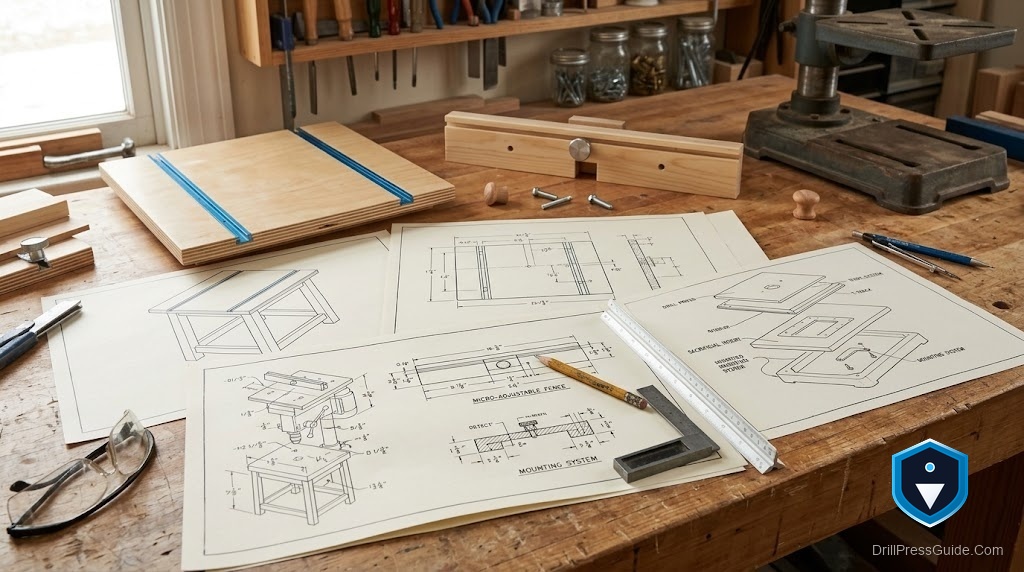
There are plenty of free drill press table plans floating around, and the price is right, but free plans vary wildly in quality. Some are complete enough to build a flat, square, accurate table from; others are little more than a photo and a rough sketch that leave out the details that actually matter. Knowing what a good set of drawings should include lets you tell a useful free plan from a frustrating one, and lets you fill the gaps in a plan that is almost, but not quite, complete.
Drill press table plans are drawings and specifications for building a work surface that mounts on the drill press factory table, adding a larger flat area, a fence, and a replaceable insert. Good drawings should include the top construction and dimensions, the mounting method, the fence and its track, the replaceable insert, and how to square the finished table to the spindle.
Short answer: the drawings should include a flat laminated top with real dimensions, a clear method for mounting to the factory table, the fence and its track with column-clearance detail, the replaceable insert, and a squaring step. A free plan missing the mounting, the column clearance, or the squaring is incomplete, however good it looks, because those are the details that decide whether the table is accurate.
The top: material, layers, and size
Good drawings should include the top clearly: what it is made of, how many layers, and its exact dimensions. Look for two laminated layers of MDF or plywood, which give a flat, stiff panel that resists warping, with length, width, and thickness specified. The drawings should show any edge banding and where the insert opening and fence track are located. Dimensions matter because the top must support your work without hitting the column, and flatness matters because it sets the table’s accuracy. A free plan that shows the top’s construction and gives real numbers lets you build the most important part correctly; one that just shows a finished board leaves you guessing.
The mounting: the detail most often missing
The most commonly omitted detail in free plans is how the table attaches to the factory table, and it is essential. The drawings should include the mounting holes or slots positioned to line up with the factory table’s holes, and the hardware, bolts into threaded inserts or captured nuts in the top, that holds it solidly, with fasteners countersunk flush. Friction mounting is not enough, since a table that shifts under load drills inaccurately. If a free plan does not show the mounting, you cannot build a table that stays put, so treat a clear mounting drawing as a requirement and be wary of plans that gloss over it.
The fence, its track, and column clearance
Good drawings should include the fence as straight, stable stock, tall enough to support work, with its mounting shown, usually a T-track set into the top with the track location dimensioned. Critically, the drawings should show column clearance, confirmation that the fence and its travel clear the chuck and column through the full spindle stroke, because a fence that fouls the column at depth is a classic failure the plan should rule out. A bit-clearance gap in the fence and an optional dust port are worth including too. When the drawings detail the fence, its track, and the column clearance, you can build a fence that positions work and locks square without hitting the machine.
The insert and the squaring step
Finally, the drawings should include the replaceable insert, a snug, flush square of the same material under the spindle, showing where the opening goes and how the insert sits flush to back up the work against tearout. And they should include a squaring step: check the surface is perpendicular to the bit with a reliable square, adjust or shim, confirm with a test hole in scrap, then square the fence. Many free plans stop at the physical build and omit squaring, but without it the table is not truly finished. Drawings that include the insert and the squaring step give you an accurate table, not just an assembled one, which is the difference between a plan worth using and one worth skipping.
Conclusion
When sizing up free drill press table plans, look past the appealing finished photo and check that the drawings include what actually matters: a flat laminated top with real dimensions, a clear mounting method to the factory table, the fence with its track and proven column clearance, the replaceable insert, and a squaring step. A free plan missing the mounting, the clearance, or the squaring is incomplete, because those details decide whether the table comes out flat, secure, and square. Choose plans that include them, or fill the gaps yourself, and even a free plan will let you build a table that turns the small factory surface into a precise, versatile work platform.
Frequently asked questions
What should free drill press table plans include? The top’s construction and dimensions, a clear mounting method to the factory table, the fence and its track with column clearance, the replaceable insert, and a step for squaring the table to the spindle.
What do free plans most often leave out? The mounting method and the squaring step. Without a clear mounting the top shifts under load, and without squaring the finished table drills inaccurately, so both are essential.
Why do the top’s dimensions matter? Because the top must support your work without hitting the column, and be flat and stiff. Real length, width, and thickness let you build a correctly sized, flat surface.
What is column clearance? Confirmation that the fence and its travel clear the chuck and column through the full spindle stroke. A fence that fouls the column at depth is a common failure good drawings rule out.
How should a plan show the mounting? With mounting holes or slots aligned to the factory table’s holes and hardware bolting into inserts or captured nuts in the top, fasteners countersunk flush, not relying on friction.
Is a squaring step really necessary? Yes. A plan that stops at assembly is incomplete. It should show checking the surface perpendicular to the bit, adjusting or shimming, confirming with a test hole, then squaring the fence.
References
- Forest Products Laboratory, wood machining and construction references, fpl.fs.usda.gov
- OSHA, Machine Guarding eTool: Drill Presses, osha.gov


