
Building a Drill Press Table That Stays Square and Useful
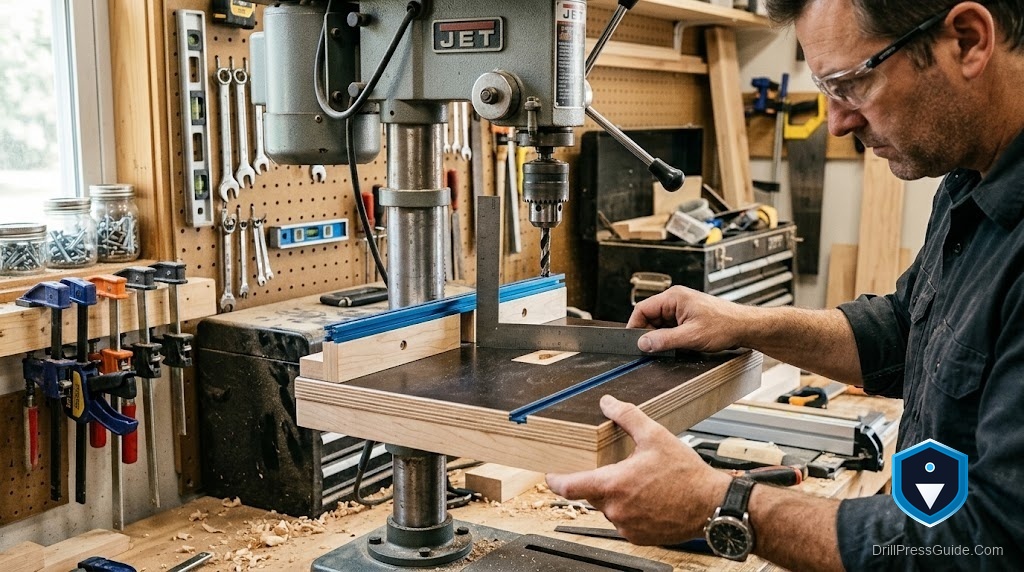
A drill press table plan is only as good as the table it produces, and the two qualities that make a table worth having are that it stays flat and square and that it is genuinely useful for real work. Plenty of plans deliver neither, a top that warps, a fence that flexes, a table that creeps out of square. This guide walks through building from a plan so the result keeps both qualities, explaining the reasoning behind each step so you can adapt any set of drawings to your own machine and work.
A drill press table is a shop-built work surface that mounts on the factory table, adding a larger flat area, an adjustable fence, and a replaceable insert. Building one that stays square and useful means starting from a dead-flat top, mounting it solidly to the factory table, adding a fence that locks straight and square, fitting a flush replaceable insert, and squaring the whole thing to the spindle.
Short answer: build a flat laminated top, mount it solidly to the factory table, add a straight fence that locks square in a track and clears the column, fit a flush replaceable insert, and square everything to the spindle. The table stays square and useful only if flatness and square are protected at every step, so those qualities guide the build rather than being an afterthought.
Start flat, because everything depends on it
The top sets the table’s accuracy, so build it dead flat before anything else. Laminate two layers of MDF or good plywood with glue, clamped flat, into a stiff panel that resists warping, then trim it square to a size that supports your work without hitting the column. Cut the insert opening and fence track while the top is open. A warped or twisted top cannot be corrected later and quietly undermines the fence and every hole, so this is where patience pays. Whatever the plan’s dimensions, prioritize getting a genuinely flat, stiff top, since a table that starts flat can stay square, while one that starts warped never will.
Mount it so it cannot shift
A useful table stays where you put it under drilling force, so mount it solidly rather than by friction. Bolt the top through the factory table’s holes or slots into threaded inserts or captured nuts set in the top, and countersink the fasteners flush so nothing catches your work. A table that creeps out of position mid-job is the opposite of useful, and it is usually a mounting that relied on clamps or the table’s weight. Solid, bolted mounting is what keeps the table located and square while you drill, so treat it as essential, not as the quick last step it is often mistaken for.
Add a fence and insert that earn their place
A table becomes useful through its fence and insert, so build them well. Make the fence from straight, stable stock, tall enough to support work on edge, riding in a T-track so it slides and locks parallel and square to the spindle, and check it clears the chuck and column through the full travel. Add a bit-clearance gap and, if you like, a dust port. Fit a snug, flush replaceable insert of the same material under the spindle, so it backs up the work against tearout and can be swapped when it fills with holes. A straight locking fence and a flush insert are what turn a flat board into a precise positioning surface, which is the point of building the table.
Square it, then trust it
With the table built and mounted, square it to the spindle: check the surface is perpendicular to the bit with a reliable square, adjust or shim until true, and confirm with a test hole in scrap, then square the fence too. Confirm the assembly sits flat and does not rock. It is tempting to assume a neat build is automatically square, but only this explicit check makes it so, and it is what converts a good-looking table into an accurate, useful one. Once squared and verified, the table is ready to trust on real work, and re-checking it occasionally keeps it that way as the wood settles.
Conclusion
Building a drill press table that stays square and useful is about protecting flatness and square from the first cut to the final check. Start with a dead-flat laminated top, mount it solidly to the factory table so it cannot shift, add a straight fence that locks square and clears the column, and fit a flush replaceable insert. Then square the whole thing to the spindle and confirm with a test hole. Follow any plan’s dimensions, but keep these priorities above the details, and the result is a broad, precise surface that gives positioned, tearout-free holes, which is exactly what makes a shop-built table one of the best upgrades a drill press can get.
Frequently asked questions
What keeps a drill press table square and useful? A dead-flat top, solid mounting to the factory table, a fence that locks straight and square, a flush replaceable insert, and squaring the whole thing to the spindle, protected at every step.
What should the top be made of? Two laminated layers of MDF or plywood, glued flat, for a stiff panel that resists warping. Flatness sets the table’s accuracy and cannot be fixed after the top is built.
Why is solid mounting so important? Because a table held only by friction or clamps creeps out of position under drilling force. Bolting through the factory table into inserts in the top keeps it located and square.
How should the fence work? Straight, stable stock riding in a T-track so it slides and locks parallel and square to the spindle, clearing the chuck and column through the full spindle travel.
What does the replaceable insert do? It backs up the work under the bit to prevent tearout and supports small parts, and it can be swapped when it fills with holes, keeping the drilling point clean.
Do I have to square the table after building it? Yes. Check the surface is perpendicular to the bit with a square, adjust or shim, confirm with a test hole, and square the fence. A neat build is not automatically square.
References
- Forest Products Laboratory, wood machining and construction references, fpl.fs.usda.gov
- OSHA, Machine Guarding eTool: Drill Presses, osha.gov


