
Drill Press Table and Fence Plans: Layout, Hardware, and Setup Choices
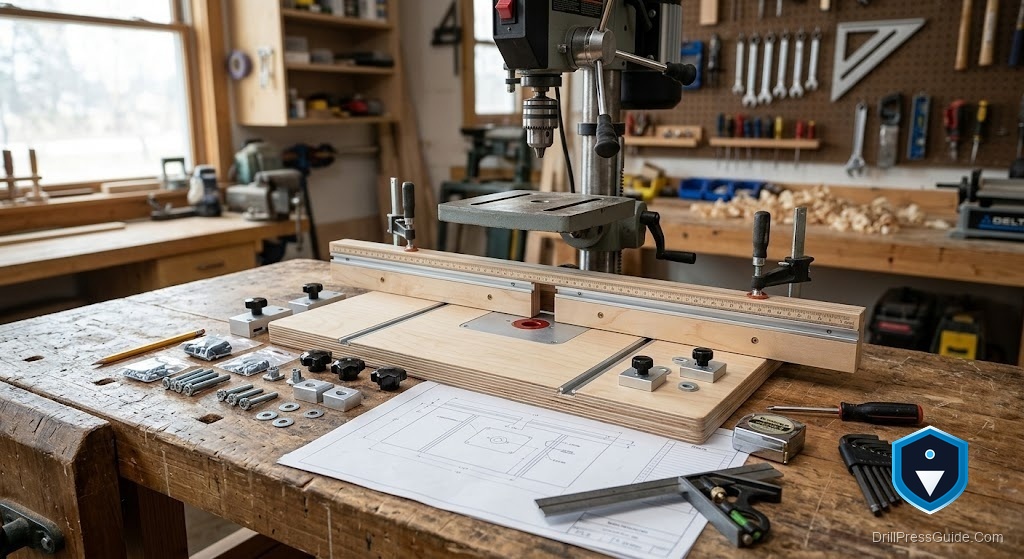
Search for drill press table and fence plans and you will find dozens, ranging from a scrap of plywood with a screwed-on stick to elaborate systems with tracks, stops, and dust ports. The differences between them are not really about looks; they are about layout, hardware, and setup choices that decide whether the finished table stays flat, whether the fence locks square, and whether the thing is a pleasure or a frustration to use. Good plans make those choices deliberately, and understanding them lets you adapt any plan to your own machine.
Drill press table and fence plans are a set of dimensions, materials, and steps for building a work surface with a straight, adjustable fence that mounts on the drill press factory table. The meaningful content of any plan is its layout, how the top, fence track, insert, and stops are arranged, its hardware, the track, knobs, and fasteners, and its setup, how the table mounts and squares to the spindle.
Short answer: the choices that matter most are a flat laminated top, a fence that rides in a track and locks straight and square, solid mounting to the factory table, and a replaceable insert under the bit. Good plans choose stable materials and quality track and fasteners, and they explain squaring the table to the spindle. Judge and adapt plans by those decisions, not by how elaborate they look.
Layout choices that decide the outcome
The layout is how the elements are arranged, and a few decisions matter most. Put the fence track where the fence can reach across your typical work while still clearing the chuck and column at full spindle travel, a common layout mistake is a fence that fouls the column at depth. Center the replaceable insert directly under the spindle. Position any stop track along the fence so stops reach the useful range. Size the top to support your work without overhanging unwieldily or hitting the column. A layout that keeps the fence clear, the insert centered, and the surface adequate is inherently more usable than one that looks feature-packed but crowds the machine.
Hardware choices that make it work
Hardware is where plans quietly succeed or fail. T-track is the common way to mount and adjust the fence and stops, so choose track sized for the knobs and bolts you will use, and set it into the top flush. Use quality knobs and bolts that lock firmly and take repeated use. In MDF or plywood, use proper threaded inserts rather than screwing into the material, since good inserts hold and cheap fixings strip. Match fasteners to the factory table’s mounting holes so the top bolts down solidly. Good hardware, matched to the layout, is what lets the fence lock without creeping and the table stay put, so plans that specify it deserve more trust than vague ones.
The fence and insert in detail
The fence is the working heart, so plans should build it from straight, stable stock, tall enough to support work on edge, riding in the track so it slides and locks parallel and square to the spindle. A gap or slot at the bit lets you drill close to the fence and clears dust, and a dust port in the fence is a worthwhile option. The replaceable insert should be a snug, flush square of the same material set under the spindle, so it backs up the work against tearout and can be swapped when it fills with holes. Plans that treat the fence as straight, locking, and clearing the column, and the insert as flush and replaceable, produce a table that actually performs.
Setup choices: mounting and squaring
How a plan mounts and squares the table is as important as the build. Mounting should bolt the top through the factory table’s holes or slots into inserts in the top, never rely on friction, with fasteners countersunk flush. Squaring should check the surface is perpendicular to the bit with a reliable square, adjust or shim as needed, and confirm with a test hole in scrap, then square the fence too. Good plans include these steps rather than leaving them to chance, because a flat, well-built table that is mounted loosely or left out of square still drills inaccurately. Treat mounting and squaring as part of the plan, not an afterthought.
Conclusion
Drill press table and fence plans are worth following when they make good layout, hardware, and setup choices, and worth adapting when they do not. Look for a flat laminated top, a layout that keeps the fence clear of the column and the insert centered, quality track and threaded inserts, a straight locking fence, a flush replaceable insert, and clear steps for mounting solidly and squaring to the spindle. Judge plans by those decisions rather than by how elaborate they appear. Understand the choices behind the drawings and you can build from almost any plan a table and fence that stay flat, lock square, and make your drill press genuinely precise.
Frequently asked questions
What should good drill press table and fence plans include? A flat laminated top, a layout that keeps the fence clear of the column and centers the insert, quality track and fasteners, a straight locking fence, a replaceable insert, and steps for mounting and squaring.
What layout mistakes should plans avoid? A fence that fouls the column at full spindle travel, an insert not centered under the bit, and a top so large it overhangs unwieldily or hits the column. Good layout keeps the fence clear and the surface adequate.
What hardware do the plans need? T-track sized for your knobs and bolts, quality locking knobs, proper threaded inserts in MDF or plywood, and fasteners matched to the factory table’s mounting holes.
Why are threaded inserts important? Because screwing directly into MDF or plywood strips out over time. Good threaded inserts hold the fence hardware and mounting bolts securely through repeated use.
How should the table mount to the drill press? Bolt the top through the factory table’s existing holes or slots into inserts in the top, countersinking fasteners flush. Friction alone lets the table shift and drill inaccurately.
Do the plans need a squaring step? Yes. A flat table mounted loosely or left out of square still drills poorly. Good plans check the surface is perpendicular to the bit, adjust or shim, and confirm with a test hole.
References
- Forest Products Laboratory, wood machining and construction references, fpl.fs.usda.gov
- OSHA, Machine Guarding eTool: Drill Presses, osha.gov


