
Homemade Drill Press: Layout, Hardware, and Setup Choices
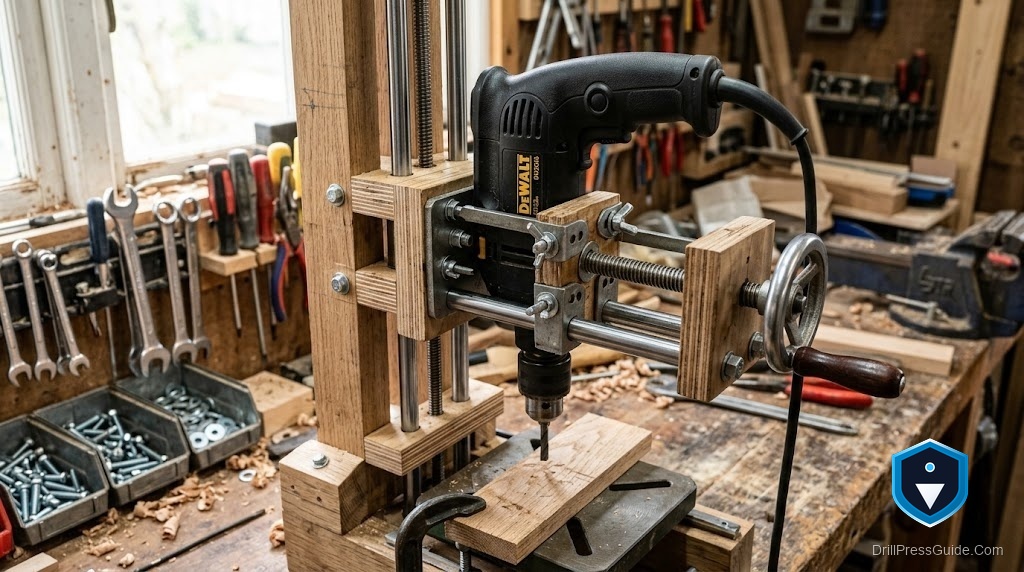
The appeal of a homemade drill press is easy to understand: you already own a capable drill, and turning it into a machine that drills perfectly straight holes seems like a small step and a satisfying build. Sometimes it is, and sometimes the result wobbles just enough to be useless. The difference lies almost entirely in the layout and hardware choices you make before you start cutting and drilling, because those choices decide whether the finished machine holds the bit truly square or lets it wander. Getting them right is the whole game.
A homemade drill press is a shop-built machine that holds a motor or, more commonly, a handheld drill and guides it straight down into the work using a column, a vertical guide, a lever feed, and a table. The layout and hardware, how the drill is held, how it is guided down, and how rigid the structure is, determine whether the machine drills accurate holes or merely looks like a drill press.
Short answer: the choices that matter are a rock-solid drill holder, a precise low-play vertical guide, a rigid column and base, and a flat table square to the guide. Choose hardware that delivers real precision at the guide, linear rails or fitted bushings rather than loose rods, and build the structure stiff. Get the layout and hardware right and a homemade machine is useful; get them wrong and it is a novelty.
Layout: how the parts relate
The layout is the arrangement of drill holder, guide, column, and table, and it has to keep the bit centered over the table and traveling straight down through its full stroke. Position the column so the drill clears the table and the work, and so the head does not foul the base at full plunge. Put the table directly under the bit with room to clamp work and swap a backing insert. Keep the guide’s travel long enough for your typical holes but no longer than the structure can support rigidly. A layout that crowds the work or extends the guide beyond what the frame can hold stiff undermines the machine before you fit a single piece of hardware.
Hardware: precision lives here
Everything accurate about a homemade drill press comes from the guide hardware. Loose rods or a sloppy channel almost guarantee play, and play means oversized, angled holes. Choose hardware that delivers real precision: linear rails with bearing blocks, a salvaged quill assembly from an old machine, or hardened rod with properly fitted guide bushings. For the drill holder, use a clamp or cradle that grips the drill with zero movement, because any wobble where the drill sits becomes a bad hole. Quality knobs, a smooth return spring, and solid fasteners round it out. This is where to spend your budget and care, since the guide and holder decide accuracy more than anything else.
Rigidity and the table
Around that precise guide you need a rigid structure. The column must resist flex and twist under drilling thrust, so a substantial steel tube or column anchored to a heavy base beats a light or wooden upright. The base must be stable enough that the machine does not rock. The table must be flat and set square to the guide, and stiff enough not to deflect when you press work against it, with a way to clamp the workpiece and a replaceable insert to back up the exit and prevent tearout. Weakness anywhere here lets the bit wander despite a good guide, so build the frame as if it will be pushed hard.
Setup and safe use
Once built, set the machine up carefully. Square the table to the guide so the bit enters perpendicular, and verify with a test hole in scrap. Confirm the drill is held with no play and the guide has no side wobble at full extension. Set an appropriate speed for the bit and material on your drill. For safety, guard exposed rotating parts, keep the switch within reach, make sure the bit cannot come loose, and always clamp the work rather than holding it by hand, since a homemade machine has no factory guarding. Re-check the holder, guide, and table square periodically, as shop-built parts can loosen with use.
Conclusion
A homemade drill press is a genuinely useful tool or a frustrating novelty, and the layout and hardware choices you make up front decide which. Lay it out so the bit stays centered over a clamp-ready table and travels straight down without fouling anything, then invest in the hardware that creates precision, a zero-play drill holder and a real low-play vertical guide like linear rails or fitted bushings. Build a rigid column, stable base, and flat square table around that guide, set it up carefully, and add the guarding a homemade machine does not come with. Make those choices well and your shop-built press will drill straight, accurate holes for years; make them carelessly and no amount of effort later will square it up.
Frequently asked questions
What decides whether a homemade drill press works well? The layout and hardware, especially a zero-play drill holder and a precise low-play vertical guide. Those determine whether the bit travels straight down or wanders.
What hardware should I use for the vertical guide? Something that delivers real precision: linear rails with bearing blocks, a salvaged quill assembly, or hardened rod with properly fitted guide bushings. Avoid loose rods or a sloppy channel.
How should the drill be held? In a clamp or cradle that grips it with zero movement, because any wobble where the drill sits becomes an oversized or angled hole.
How rigid does the structure need to be? Rigid enough that the column, base, and table do not flex or rock under drilling thrust and side forces. Build it as if it will be pushed hard sideways.
How do I set the table square? Square the table to the guide so the bit enters perpendicular, and verify with a test hole in scrap. Re-check periodically, since shop-built parts can loosen.
What safety features should I add? Guard exposed rotating parts, keep the switch within reach, ensure the bit cannot come loose, and always clamp the work, since a homemade machine has no factory guarding.
References
- OSHA, Machine Guarding eTool: Drill Presses, osha.gov
- Forest Products Laboratory, machining and construction references, fpl.fs.usda.gov


