
Planning a DIY Drill Press Table: What the Drawings Need to Show
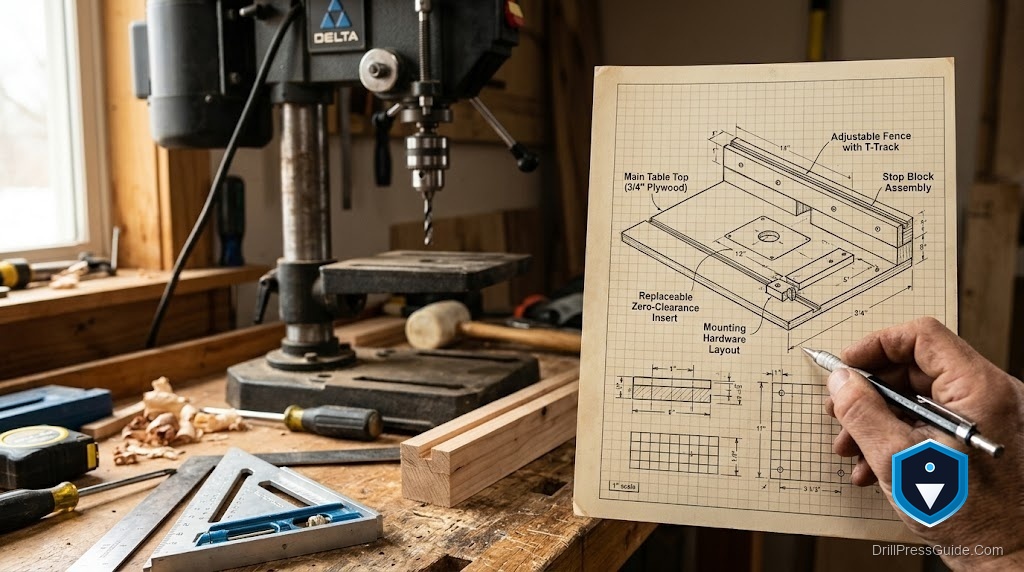
A DIY drill press table is one of those projects that looks simple until you start drawing it, and then the questions pile up: how big, what fence, how does it mount, where does the insert go? The difference between a table that improves your drilling and one that fights you every time is almost always in the planning, not the building. Getting the drawings right before you cut anything is what turns a weekend project into a tool you use for years, so it is worth understanding exactly what those drawings need to show.
A DIY drill press table is a shop-built auxiliary table that mounts on the factory drill press table to add a larger flat surface, a fence, and a replaceable insert for woodworking. Planning it means producing drawings that specify the top’s size and construction, the fence design and travel, the mounting method to your specific machine, and the insert location, so the finished table is flat, square to the spindle, and genuinely useful.
Short answer: your drawings need to show a flat top sized to your work, a straight fence that clears the chuck and locks square, a solid mounting to your machine, and a replaceable insert under the spindle. Nail those four in the plan, with real dimensions and hardware called out, and the build goes smoothly and the result is accurate.
Start with your machine and your work
Before drawing anything, measure your drill press: the factory table size, its mounting holes or slots, the column position, and the maximum height the table sits at. Then think about your work: the largest panels you drill and the kinds of holes you make. These two inputs set the size of the top, big enough to support your work but not so large it hits the column or becomes unwieldy, and the mounting approach. Drawings that start from real measurements of your specific machine avoid the classic mistake of building a table that does not fit or fouls the column at full travel.
What the top and fence drawings must specify
The top drawing should call out the material and thickness, usually two laminated layers of MDF or plywood for a flat, stiff surface, and the overall dimensions. It should show the insert opening located directly under the spindle. The fence drawing is just as important: show a straight fence, its height, how it attaches, and how far it travels, and confirm in the drawing that it clears the chuck and column throughout that travel. If you plan a T-track for the fence or hold-downs, draw its exact position. Specifying these on paper, with dimensions, is what prevents the fence from hitting the column or the insert from ending up off-center.
Mounting and hardware, drawn explicitly
The mounting is the part beginners most often leave vague, and it is the part that decides whether the table stays put. Draw exactly how the table attaches to the factory table, bolts through existing holes, cleats that hook the edges, or clamps, and show the fastener sizes. Call out the T-track, knobs, and any threaded inserts with their sizes so you buy the right hardware once. Show fasteners countersunk flush so nothing snags the work. A mounting drawn in detail, rather than improvised at the bench, is what keeps the finished table from shifting under load and losing the accuracy you built it for.
Plan for squaring and adjustment
Good drawings also anticipate setup. Include a way to shim or adjust the table so it can be made square to the spindle, because no table mounts perfectly square by luck. Plan the insert to sit flush and be replaceable. If you want dust collection, show the port or slot in the drawing rather than adding it awkwardly later. Thinking through adjustment and squaring on paper means the finished table can actually be dialed in, instead of being flat and solid but permanently a few degrees off. The best plans build in the means to correct, not just the parts to assemble.
Conclusion
Planning a DIY drill press table is mostly about making the drawings do the hard thinking before the saw does. Start from real measurements of your machine and your work, then show four things clearly: a flat top sized correctly, a straight fence that clears the chuck and locks square, an explicit and solid mounting to your specific table, and a replaceable insert under the spindle, with hardware and a means of squaring called out. Drawings that specify those details prevent the common failures, a table that fouls the column, a fence that will not sit square, a mount that shifts, and turn a simple project into a precise, lasting upgrade to your drill press.
Frequently asked questions
What should DIY drill press table plans include? A flat top sized to your work, a straight fence that clears the chuck and locks square, an explicit mounting to your machine, and a replaceable insert under the spindle, all with real dimensions and hardware called out.
How big should the table be? Big enough to support the largest panels you drill, but not so large it hits the column or becomes unwieldy. Size it from your actual work and your machine’s column position.
What material works best for the top? Two laminated layers of MDF or plywood give a flat, stiff surface. Flatness matters most, since any warp undermines the accuracy the table provides.
How should the fence be designed? Straight, adjustable, and locking square to the spindle, with enough travel for your work and clearance from the chuck and column throughout that travel. Draw the travel to confirm the clearance.
How do I make sure it mounts securely? Draw the exact attachment, bolts through existing holes, cleats, or clamps, with fastener sizes. A detailed mounting plan keeps the table from shifting under load.
How do I keep the table square to the spindle? Build in a way to shim or adjust the mounting so you can square it during setup, and re-check periodically, since wood moves and hardware can loosen.
References
- Forest Products Laboratory, wood machining and movement references, fpl.fs.usda.gov
- OSHA, Machine Guarding eTool: Drill Presses, osha.gov


